• For every workflow creation, Start Task and End Task which must be needed to add.
  • Using drag and drop feature, you can easily move and place the Start Task Control.
  • Right click the Start Task node, then you can see two options such as Properties, and Delete.

Go To Properties #

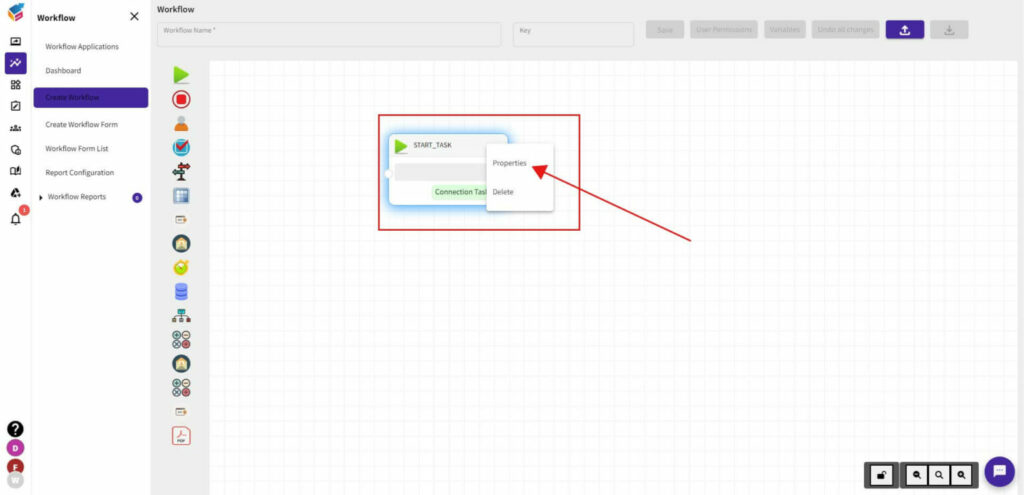
  • Select Properties of the Start Task that will show its properties like this.
  • Here, you can start the task by entering the mandatory details of Name, Assignee User, and Assignee Group.
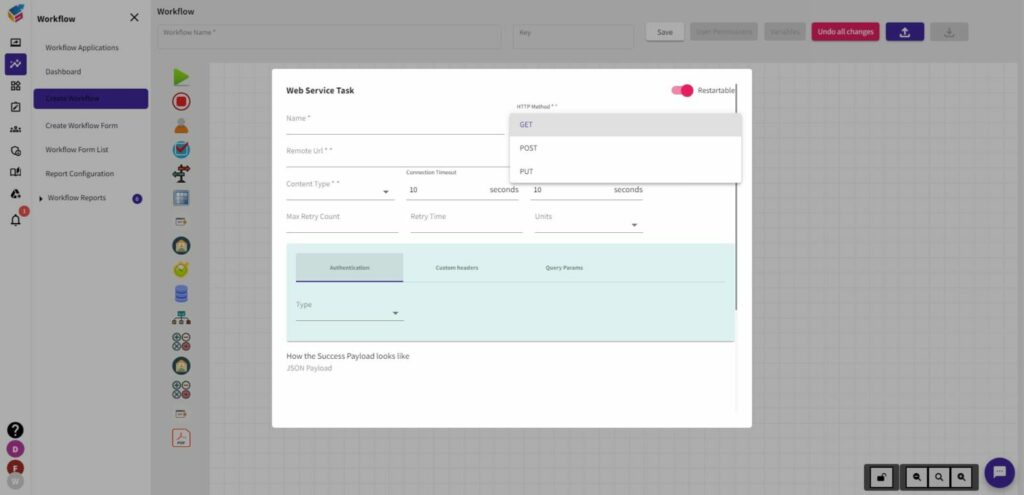
  • You can choose and use Manually, Webservice call, or Scheduled options to start the task.
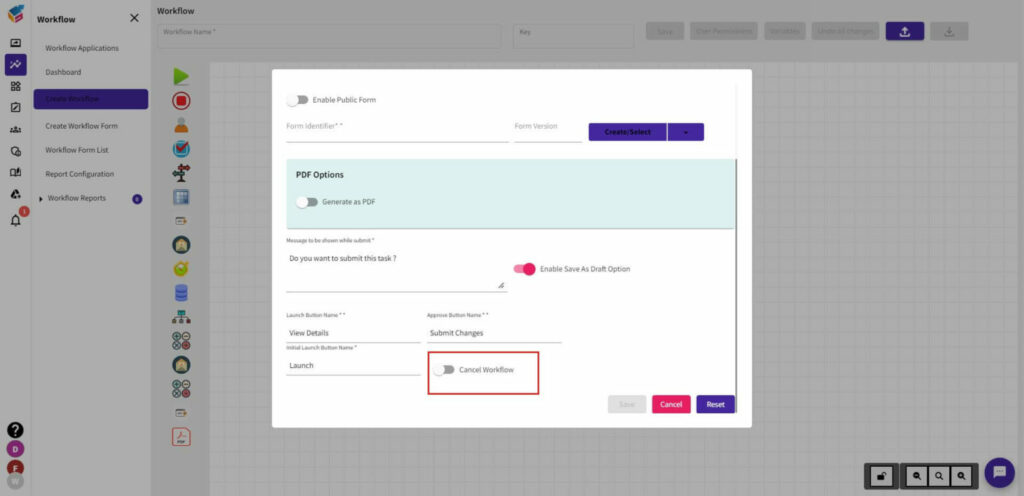
  • After selecting the option, you can enable/disable the Public Form whenever required.
  • On the right, you can see the drop-down button for create/select the workflow. Using this feature, you can choose Create New Form or Select Existing Form options along with mentioning your Form identifier, Form Version.
  • There is an input field for asking you to submit this task. If you submit the task, the messages will be shown.

Save Task #

  • On the other hand, you can enable/disable the Save Us Draft option as per your choice.
  • You have to enter the Launch Button Name, Approve Button Name, and Initial Launch Button Name as mandatory in the corresponding input fields.
  • In case you want to cancel the Workflow means, you can enable this option. Otherwise, disable it as shown in the screen.

Cancel Task #

  • If you enable Cancel Workflow, you have to enter the Cancel Button Name as mandatory.
  • At last, you can either Save, Cancel, or Reset the task which you have created.