


However, what about all those cycles that are so difficult to track? You could always try establishing your own CRM system!
What is a CRM?
A CRM, or customer relationship management system, is a software application designed to manage customer relations. It helps companies manage customer data and interactions, ensuring that customers receive the best service possible.
If you want to learn more about building your own CRM in Yoroflow, or if you have any questions, don’t hesitate to contact our support team at contactus@yoroflow.com.
Why do you need a CRM?
CRMs can help businesses manage customer relationships more effectively.
They can help you track what customers want and how you can best serve them to make more money.
Plus, CRMs come in all shapes and sizes, so there’s sure to be one perfect for your business.
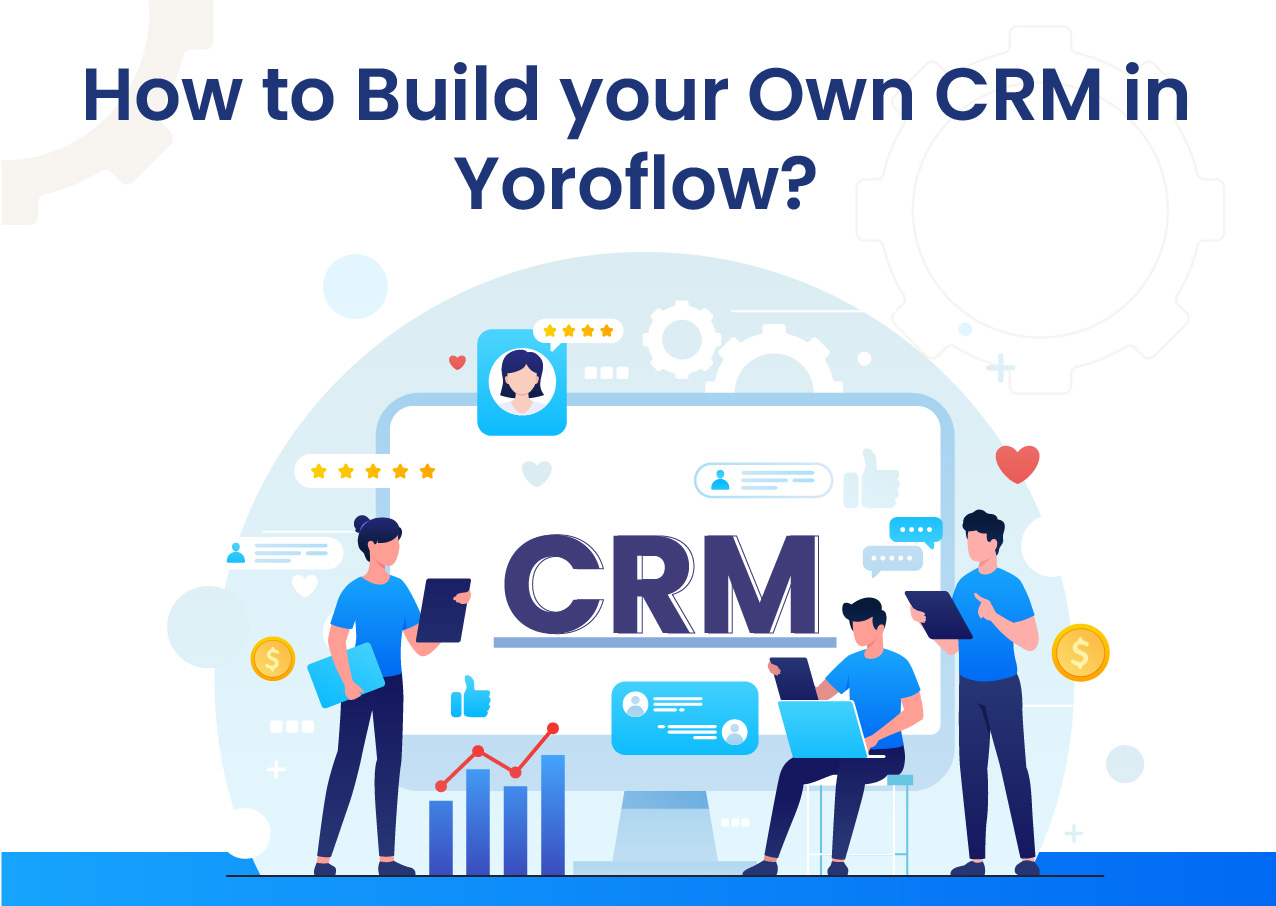
How to build your own CRM in Yoroflow?
Now that you’ve created an account, it’s time to create a new CRM!
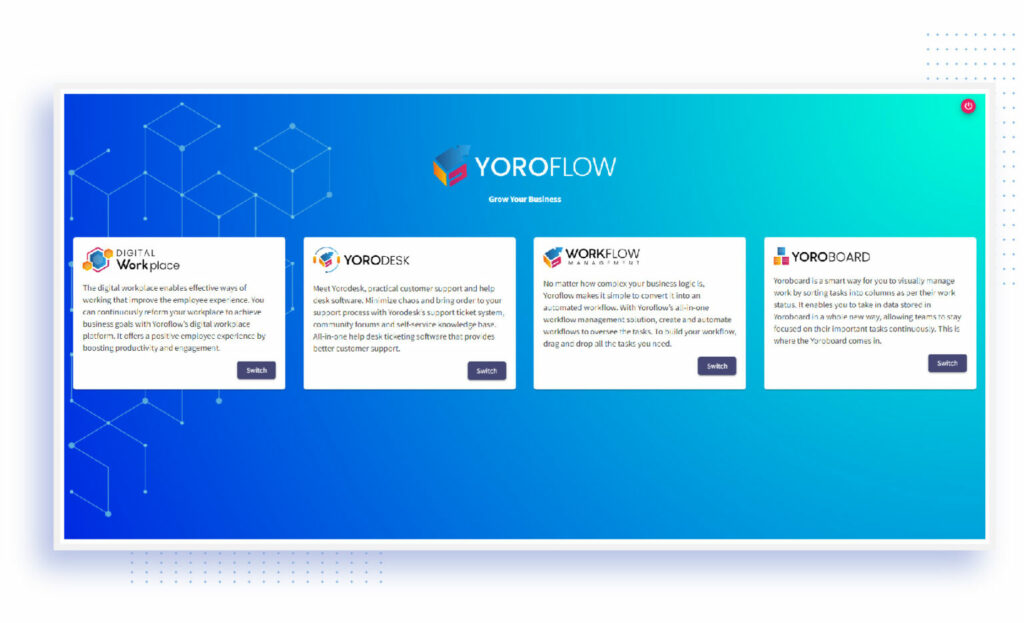
Switch Product
Step 1: Switch to the Yoro account.
Step 2: In the dashboard, tap the template centre to see all the marketing and sales templates.
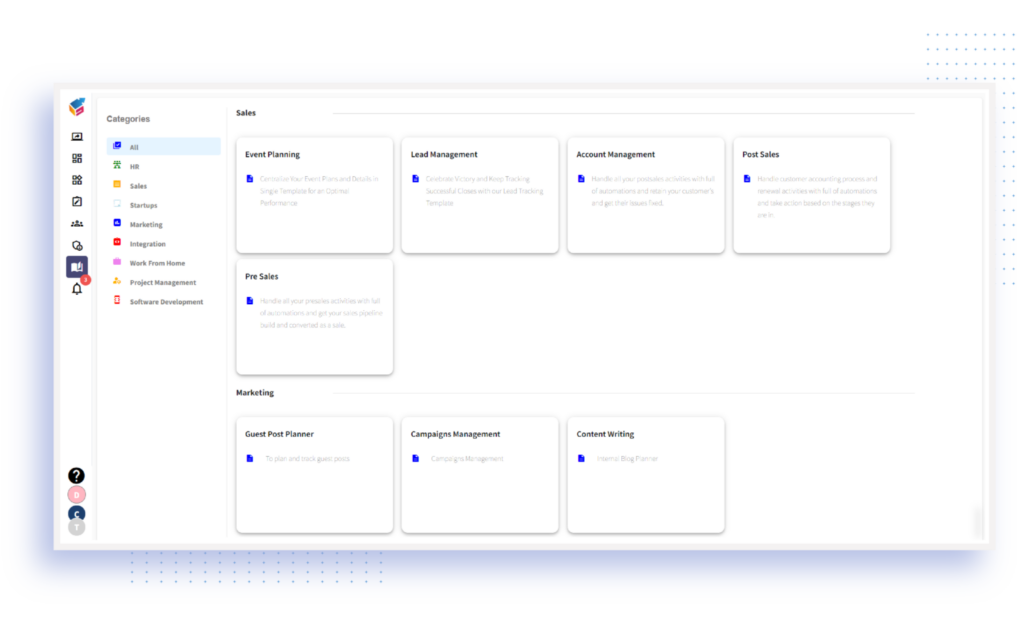
Popular Sales and Marketing Templates in Yoroflow:
- Lead management
- CRM
- Sales Pipeline
- Blog Management
- SMS Marketing
- Event Planning
- Client Invoice Tracker
- Campaigns Budget Tracker
- Keyword Research
- Social Media Post Scheduler Form
Choose Template
Board Configuration
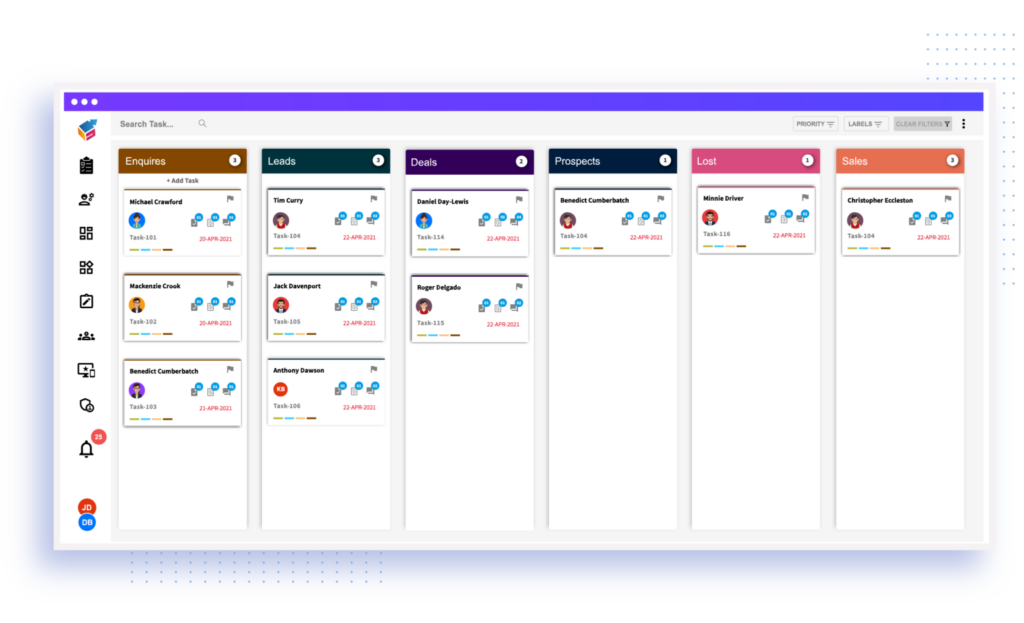
Step 4: If the taskboard owner wants to create their own CRM, they must configure the taskboard using the taskboard name and key along with the description.
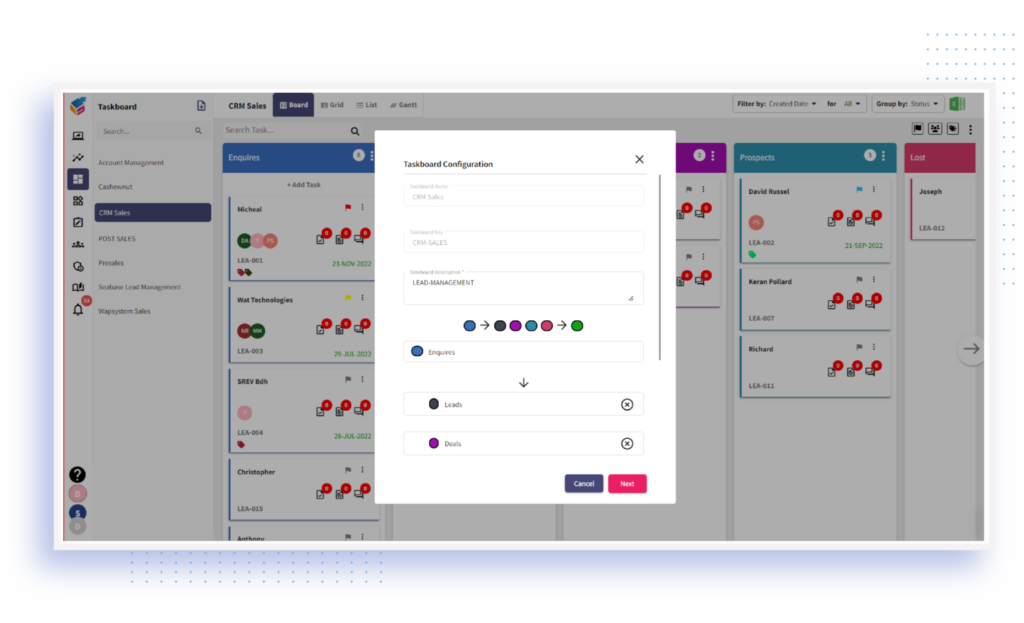
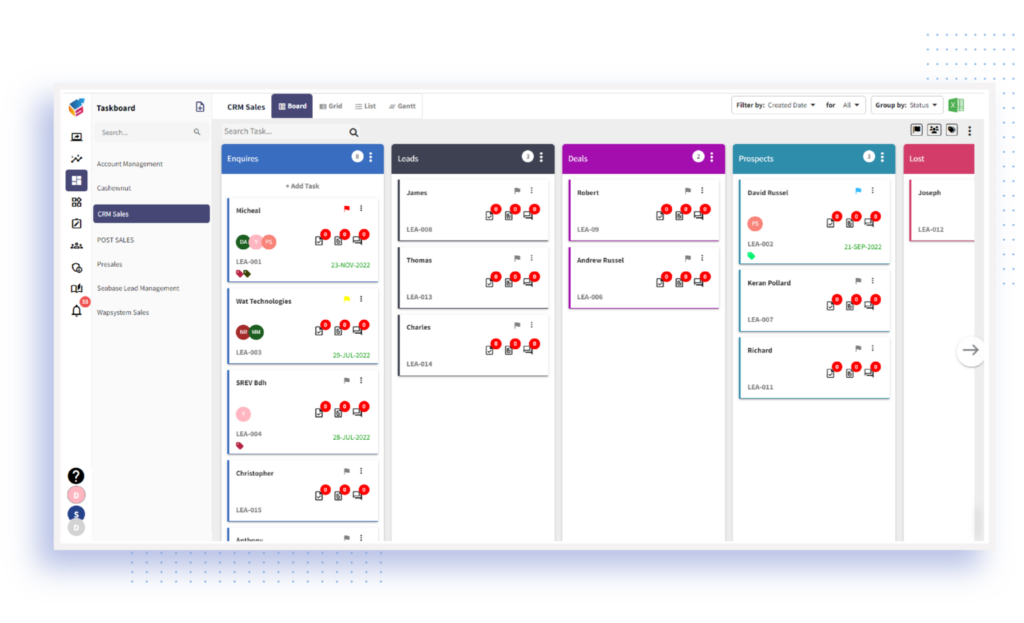
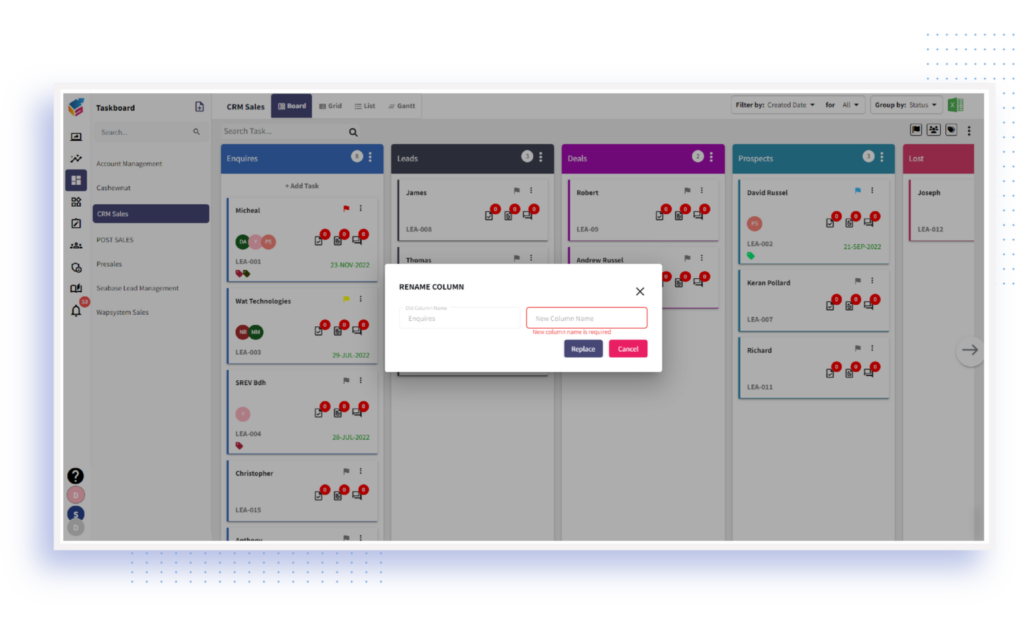
Example of CRM Taskboard’s Column Name:
- Enquires
- Lead
- Deal
- Prospects
- Lost
- Sales
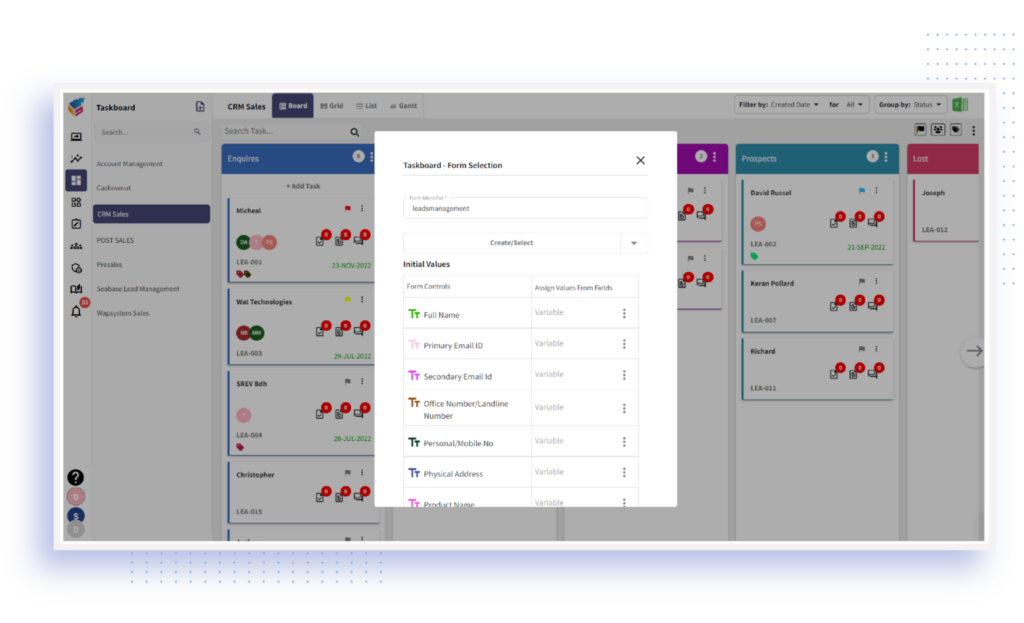
Step 5: A preview of the created task board with chosen color is displayed. You will get the Form Identifier unless you can create or select the form. After that, Task ID has generated. Now, Taskboard owner can confirm their board creation.
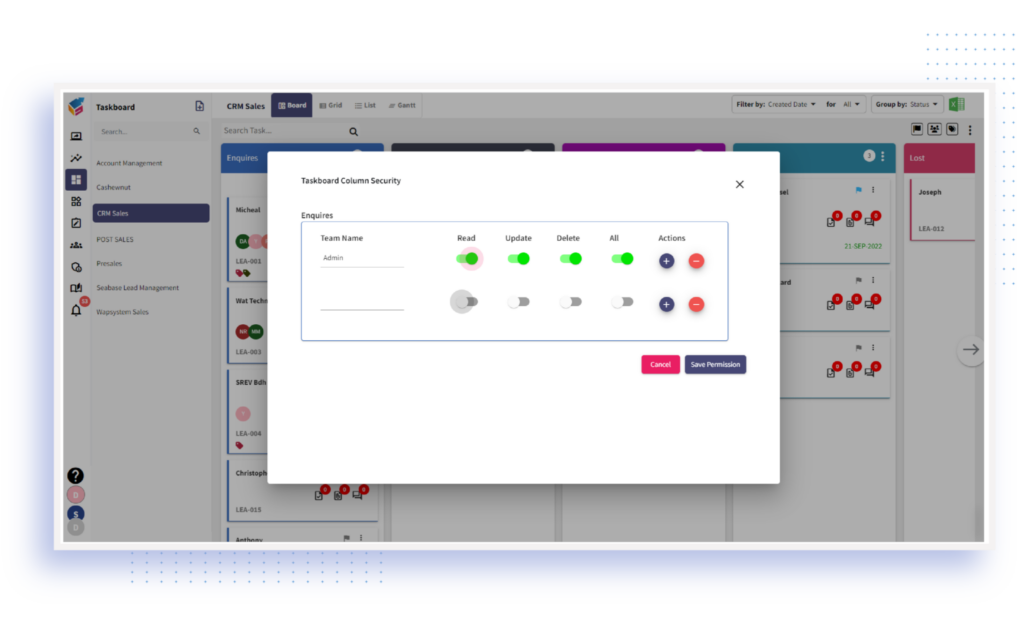
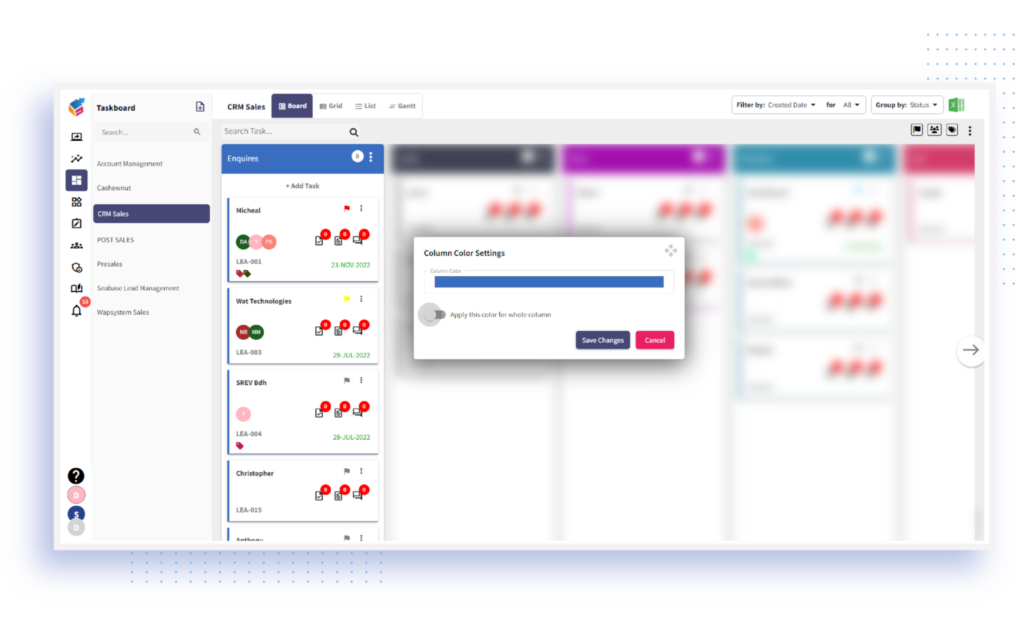
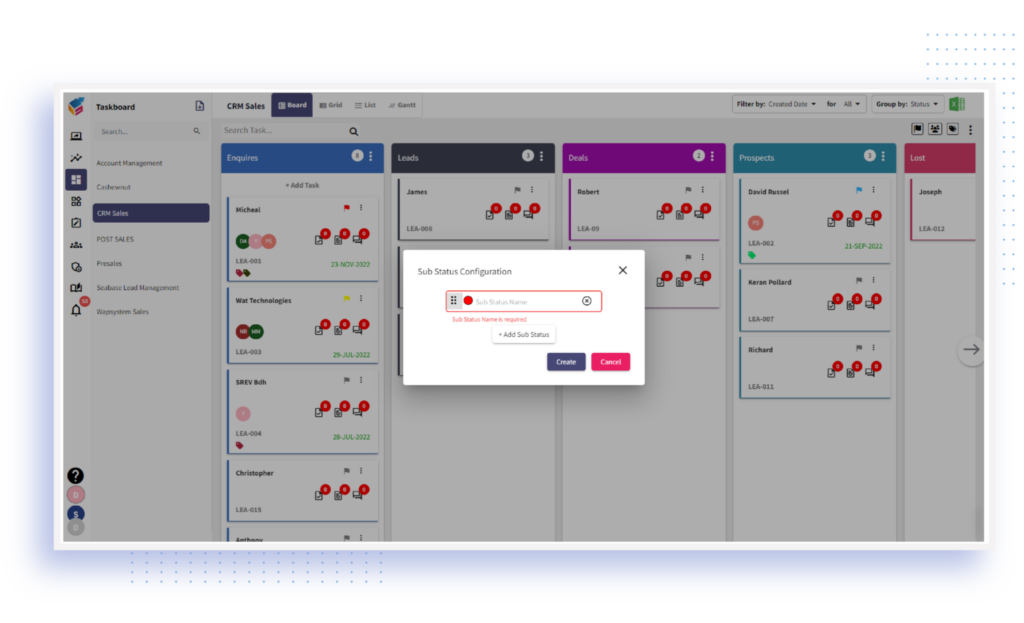
Board Properties
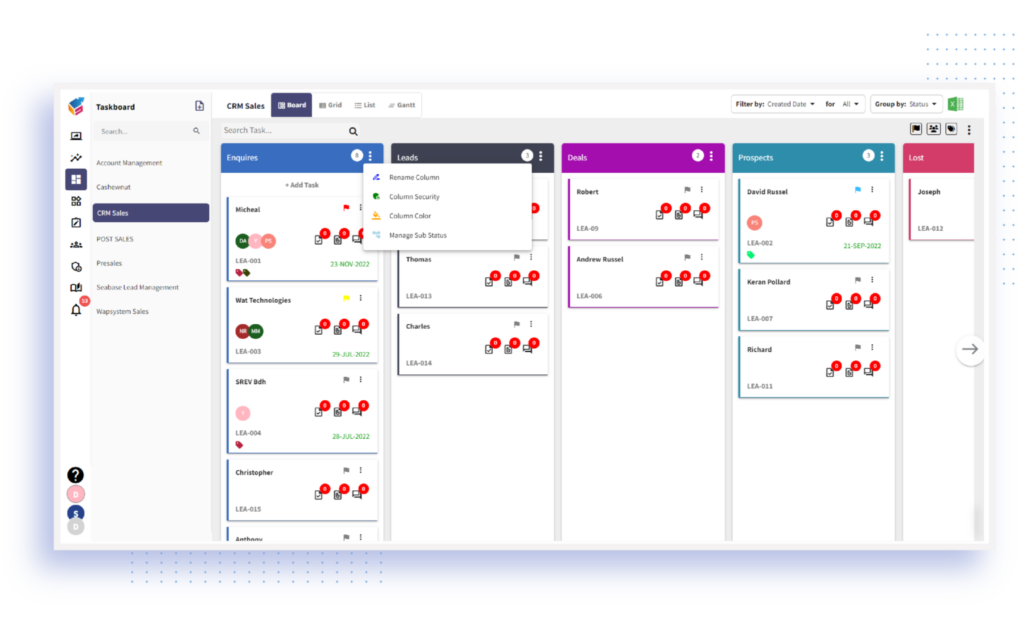
There is a ‘Column Security’ option available. Using this, you can permit users who will access the specific column.
The ‘Color‘ of the column from the Color Slider to choose a custom color.
Use the ‘Manage Sub Status’ option to add, rename, and delete the sub status whenever required.
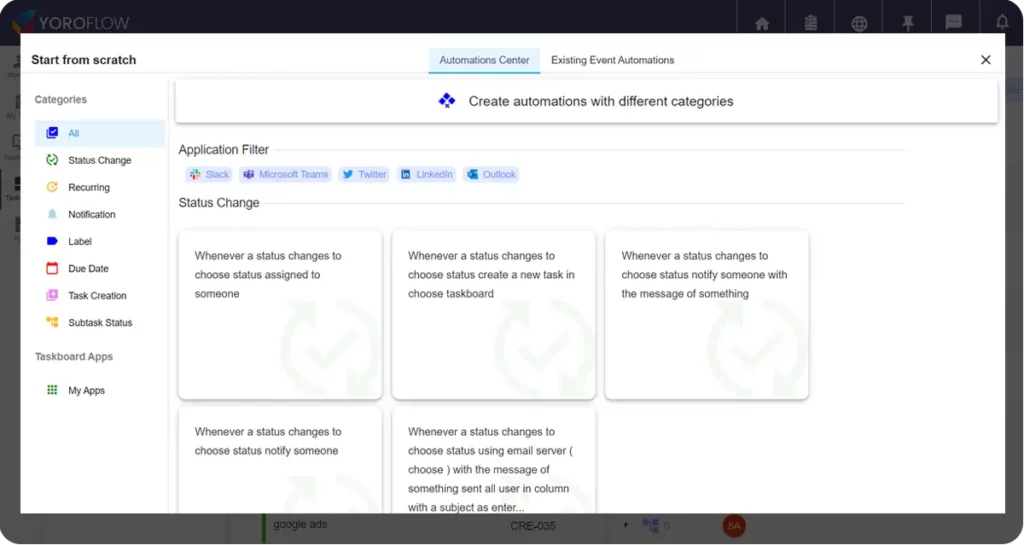
Automate CRM
Step 7: Yoroflow’s sales automation allows you to earn the trust of your prospects and deliver a better customer experience in the process, such as Auto Assign, Notification, SLA escalation, and Event-based Automation.
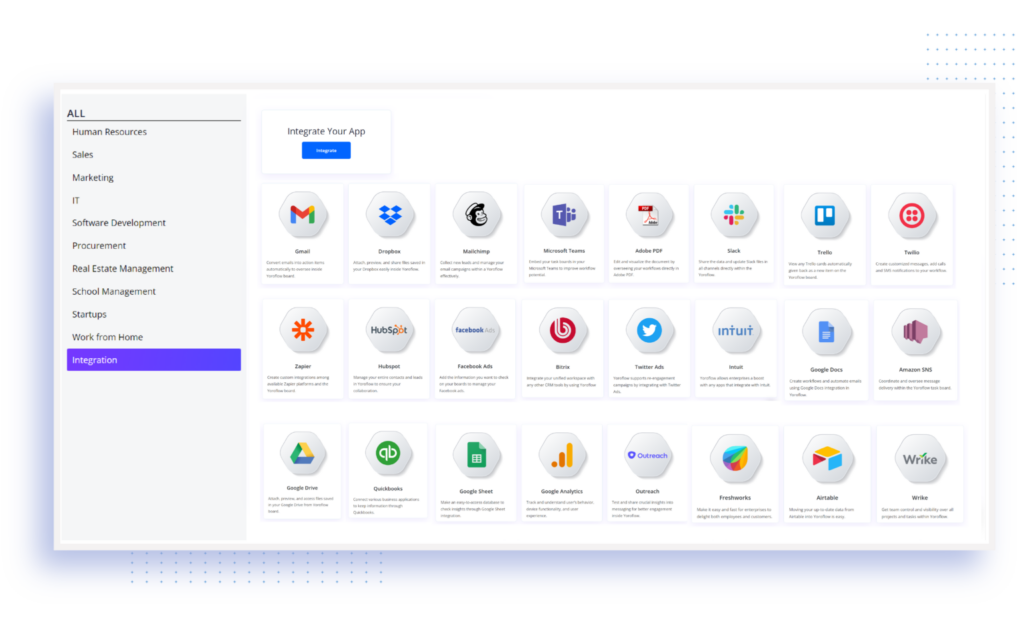
Integration
Step 8: Connect Yoroflow with 100+ third-party apps to automate your business workflows and stay efficient at work. Ex: Twilio, Outlook, Gmail, Zoom, MS Teams, Aircall, etc.,
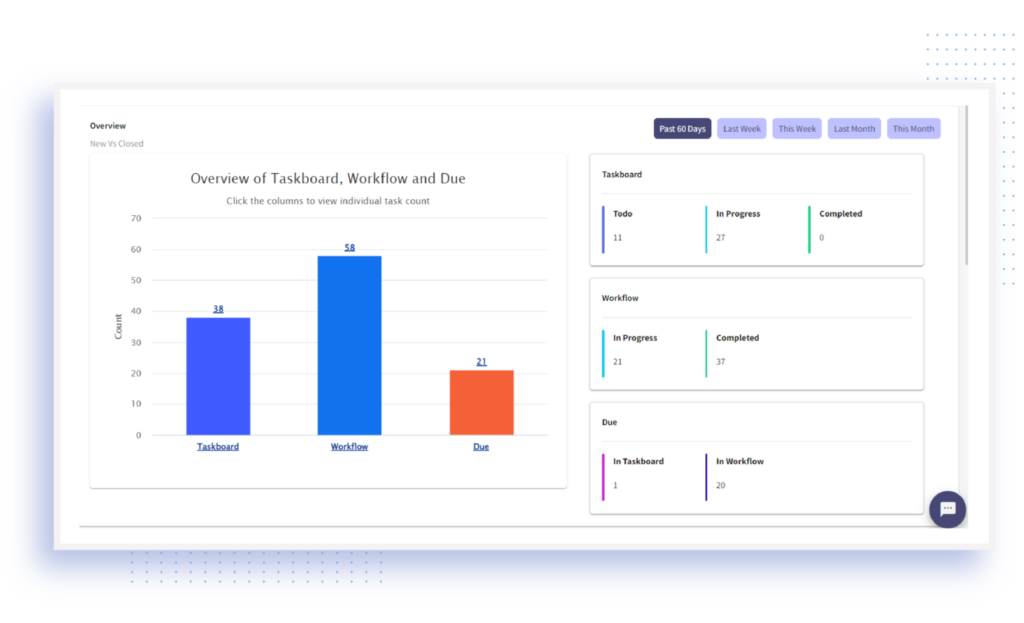
Dashboard
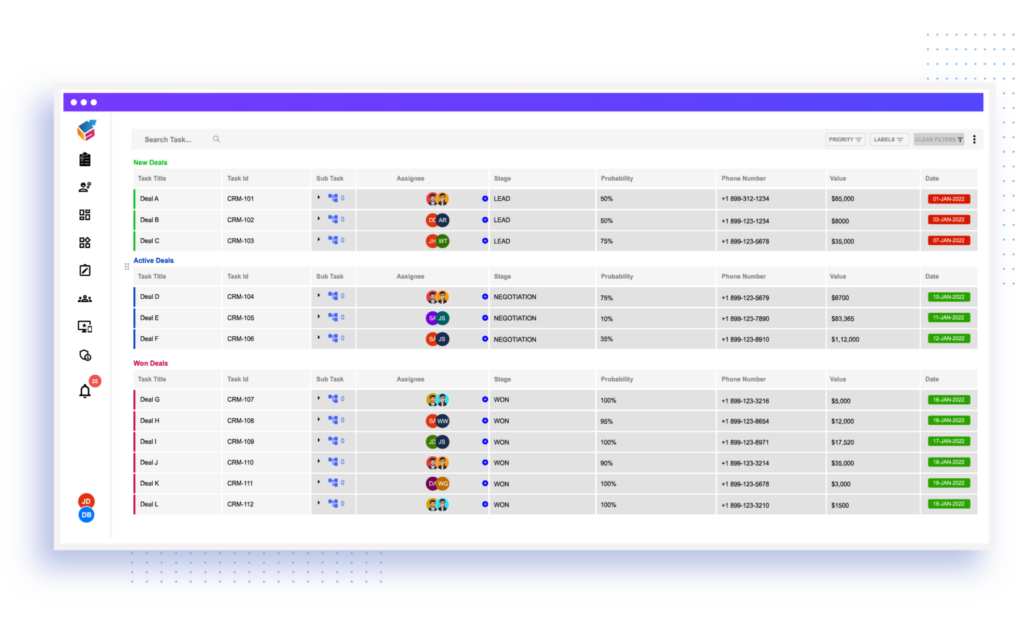
Step 9: Turn your data into insightful reports and analytics. Deliver insight and drive efficiency with Yoroflow’s automated reports and deep analysis system. Taskboard owners can filer the report based on user, status, priority, and task-based widgets.
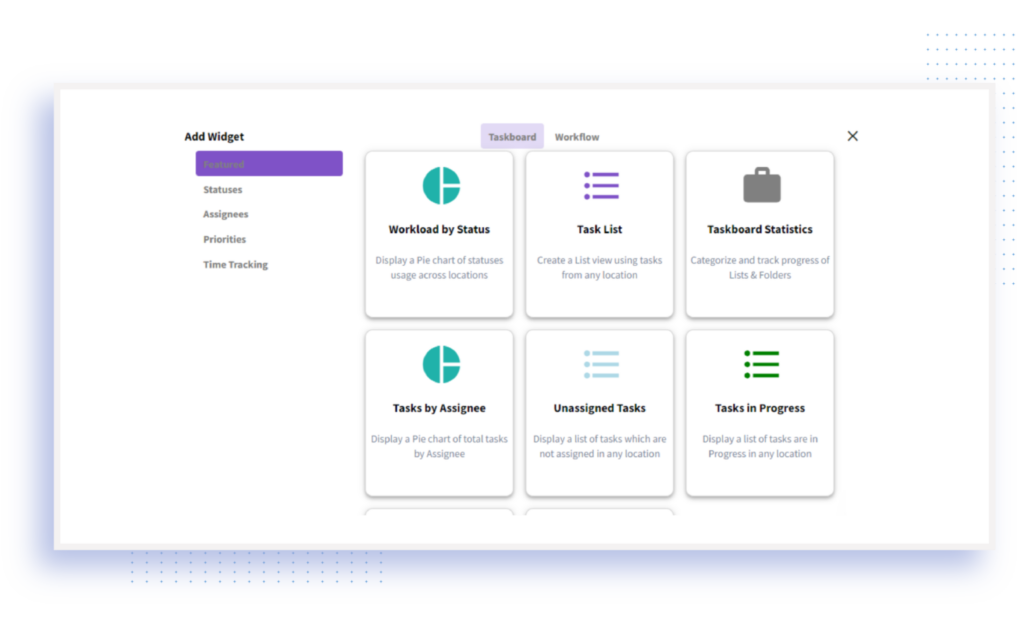
Build Reports
Step 10: Creating custom reports offers access to the exact information while enabling the users to connect with data through functionalities. Also, Yoroflow allows you to export the reports.
This is how Taskboard owner can create their own CRM in Yoroflow.
Tips for building your own CRM in Yoroflow
- Set up a system for collecting data from your customers. This means collecting information such as names, addresses, and contact information. You’ll also need to track what products and services they’ve purchased from you and when.
- Create profiles for your customers so you can better understand their needs. For instance, develop a profile for a happy customer who has always been satisfied with your products and services and one for a dissatisfied customer who has had multiple interactions with you about problems with your product or service.
- Keep track of how much money each customer spends with you. This data can help you determine which products and services are selling well and which need improvement.
- Analyze the data collected in Step 2 to see how you can improve your services or products based on your customers’ needs.
Choosing which version of Yoroflow you should use
Yoroflow Business
The Yoroflow Business plan is perfect for you if you’re starting out! This plan lets you access our features and tools, including our CRM platform. This plan comes with a free trial, so you can try it out before deciding.
Yoroflow Standard
If you’re looking for more features and flexibility, the Yoroflow Standard plan is for you! With this plan, you’ll gain access to our messaging features, custom domains and 50 GB storage, and our CRM platform. This plan also comes with a free trial, so you can try it out before deciding.
Yoroflow Pro
Building your own CRM in Yoroflow made easy!


