


YoroCRM Features
Today, we’re going to dive into the technical side of YoroCRM and take a closer look at its features. As the business world becomes increasingly reliant on technology, the importance of having a robust and effective customer relationship management system has never been higher.
That’s where YoroCRM comes in. This innovative platform was designed to help businesses of all sizes streamline their sales, marketing, and customer service efforts
But what exactly makes YoroCRM so special?
In this blog, we’ll break down the various features that set it apart and show you how they can help your business thrive. Whether you’re a seasoned sales professional or just getting started, this post will provide a comprehensive overview of YoroCRM’s technical capabilities.
So, let’s get started!
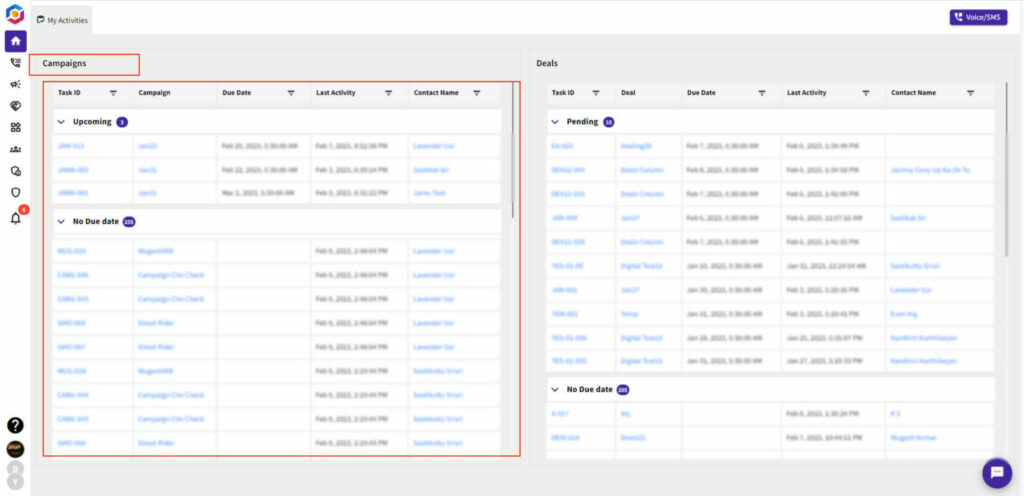
My Activities
Campaigns
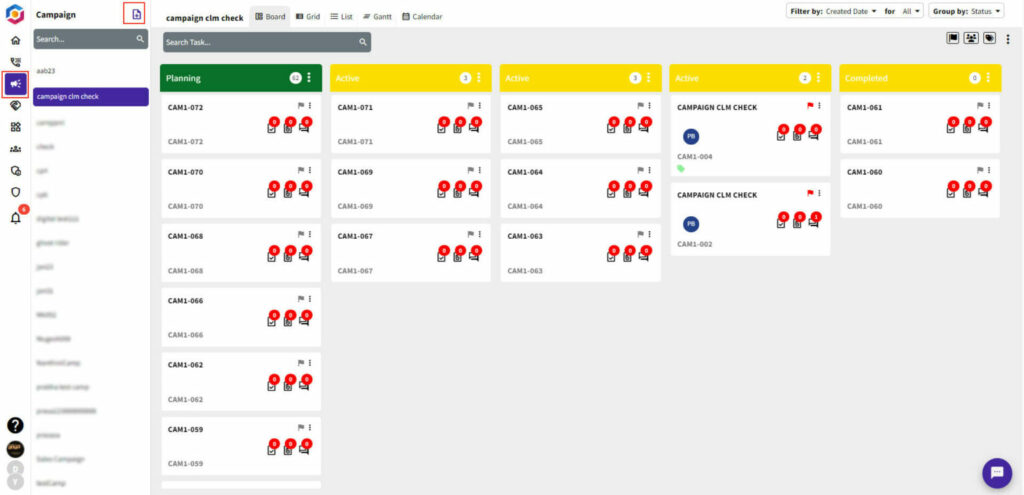
Campaigns are a crucial component of YoroCRM that help you keep track of your marketing efforts and measure their effectiveness.
Once you’re logged in, click on the “Home” module in the main menu to access the landing page.
- View the list of campaigns
- Filter the campaigns
- View campaign details
- Track the campaign’s performance
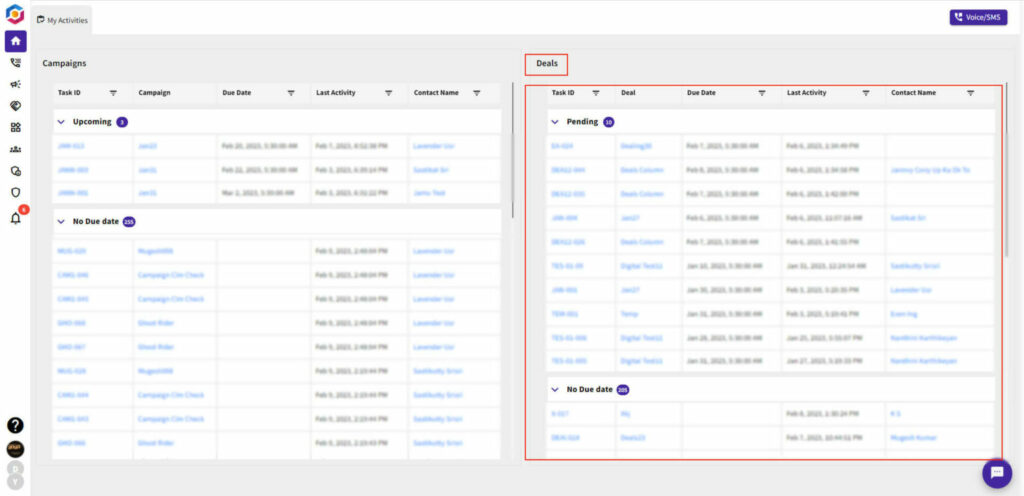
Deals
Viewing deals in YoroCRM is a straightforward process. With these steps, you should be able to view and manage your deals effectively.
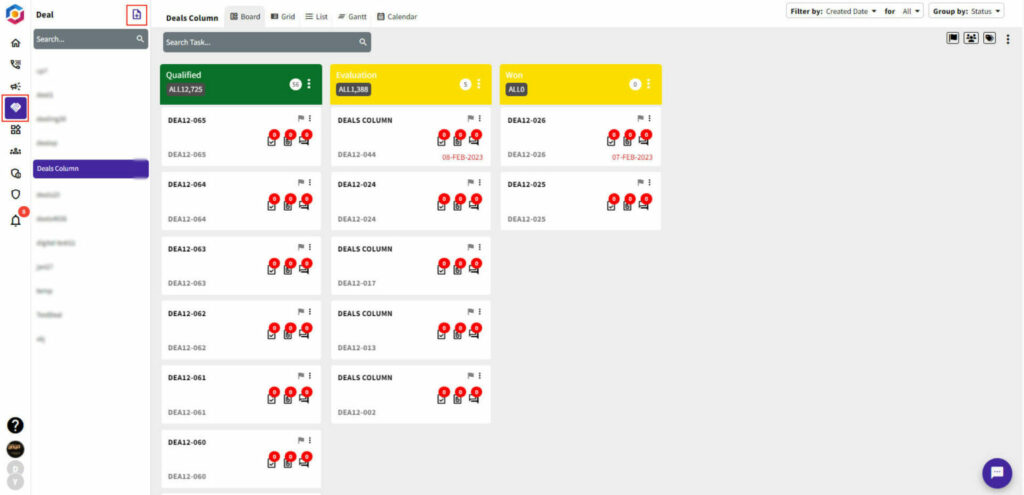
Once you’re logged in, you’ll see the YoroCRM home page. Here, you can:
- View Deals
- Filter Deals
- View Deal Details
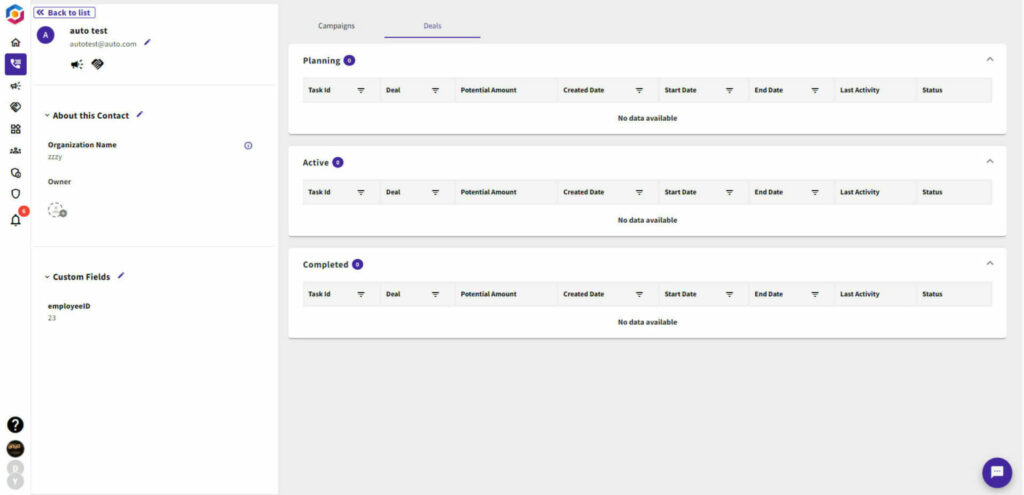
Contact Details
Contact Details
- You’ll see the YoroCRM home page. To view your contact, click on the “Contact details” module on the home page.
- The Contacts module will display a list of all the contacts in your account.

- You can sort the contacts based on various criteria such as contact name, company name, email address, mobile number, and owner, etc.
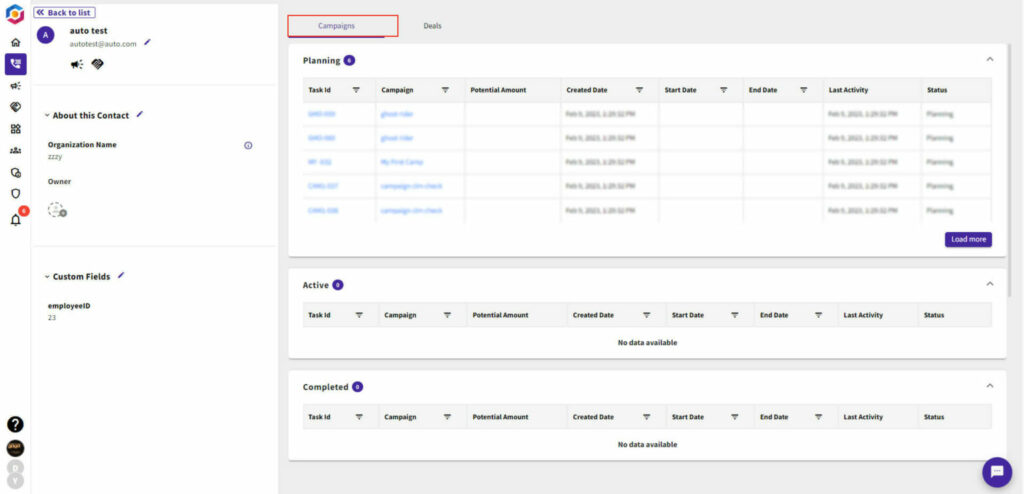
- Here, you can view the status of your campaigns and deals, so you can see the stages and counts of which tickets are planning, active, or completed.
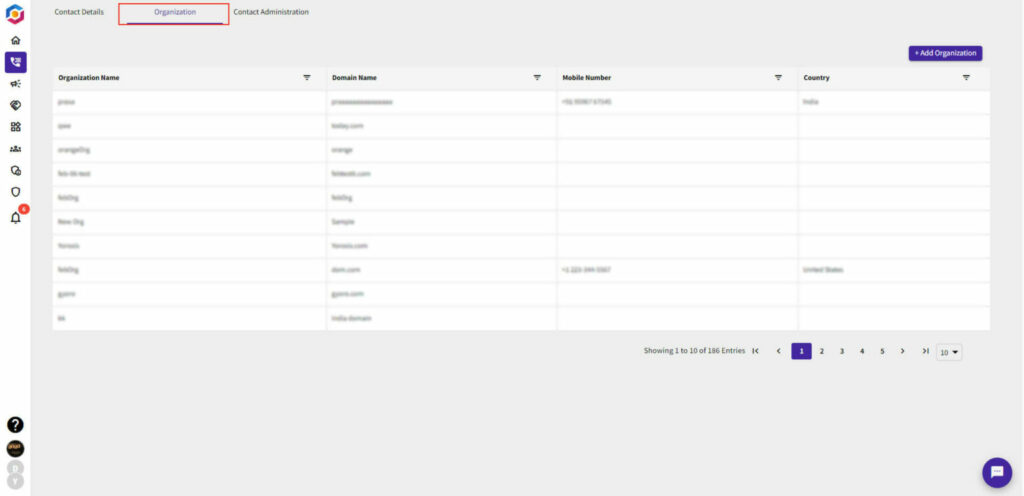
Organization
- The Contacts module will display a list of all the organizations in your account. You can sort the it based on various criteria such as organization name, domain name, mobile number, and country, etc.
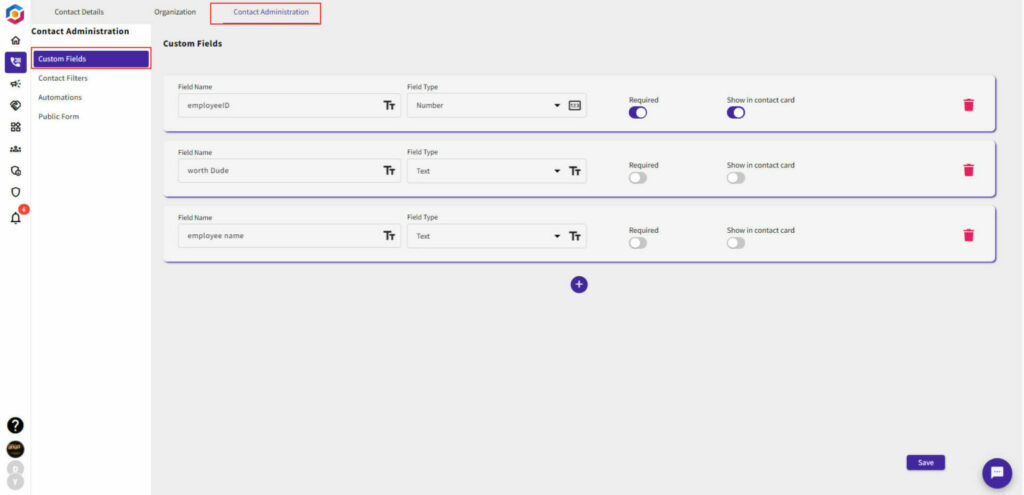
Contact Administration
- In the Contact Details menu, click on the “Contact Administration” option.
- The Contacts tab will display all the contact administration settings in YoroCRM. This includes settings for custom fields, contact filters, automation, and public form as shown below.
Custom Field
- Go to the Contact Administration menu and select Custom Field.
- From the Fields page, click on the module where you want to add a custom field.
- Fill in the required information for the custom field, including the field name, type, and whether the field is required or not.
- Save your changes.
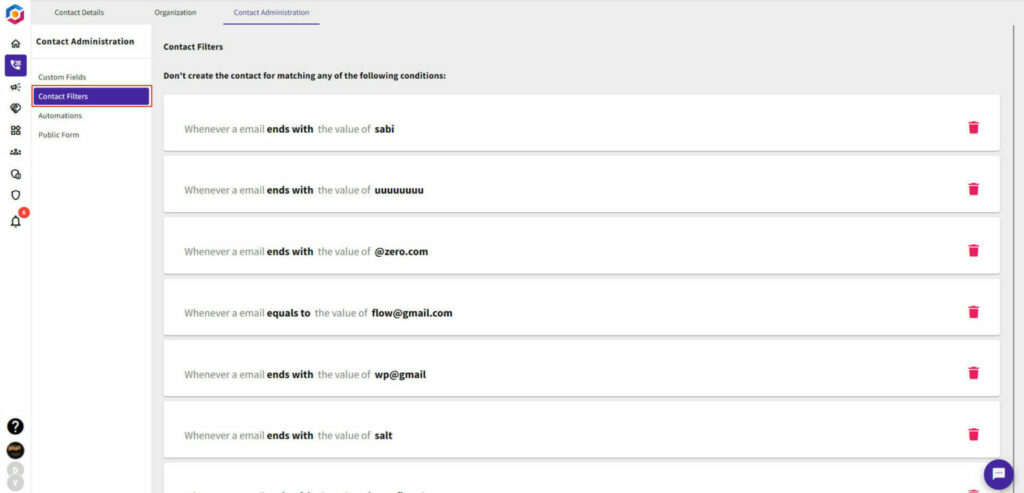
Contact Filters
- Go to the Contact Administration module in YoroCRM.
- Click on the Filter from the left side menu.
- From the Filter dropdown menu, select Create Filter.
- You can choose from a variety of criteria, including contact information, ownership, and activity history.
- Click on the Save button to save your filter.
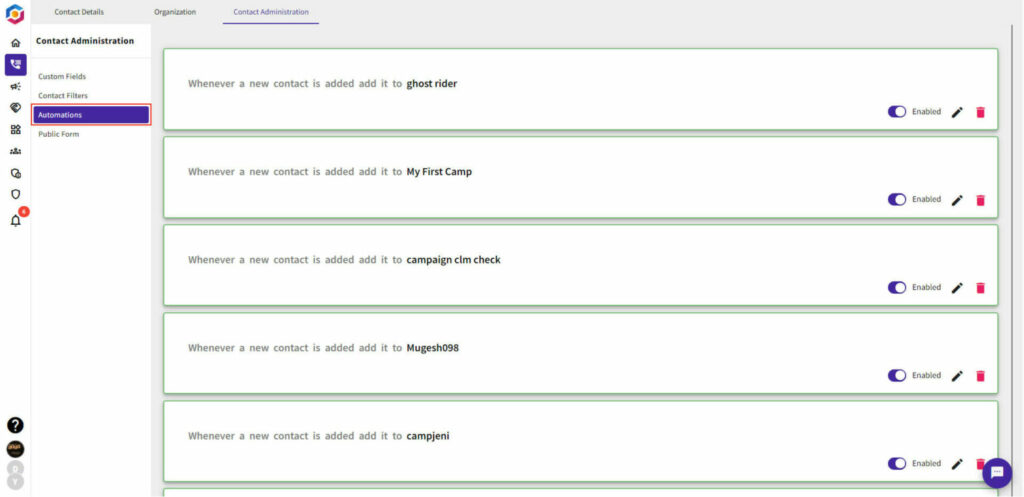
Automation
- Once you have created an automation rule, it will automatically be applied to the specified module.
- You can view and manage your automation rules by going to the Automation menu.
- From the Workflow Rules page, you can edit or delete rules as needed.
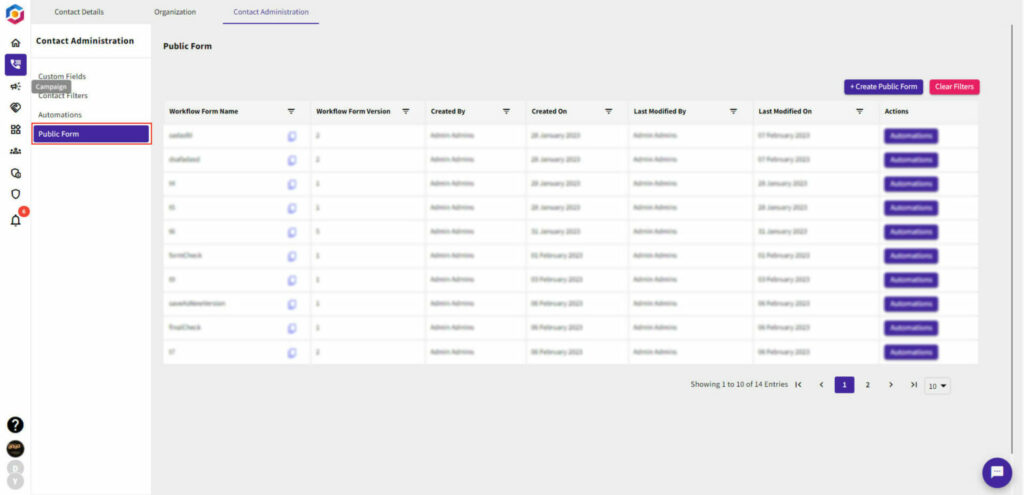
Public Form
- Click on the Create Public Form button in the top right corner.
- Give your form name and select the module where you want the form to submit information, such as leads or contacts.
- Use the form builder to add fields to your form, such as name, email, and phone number.
Activities
Call
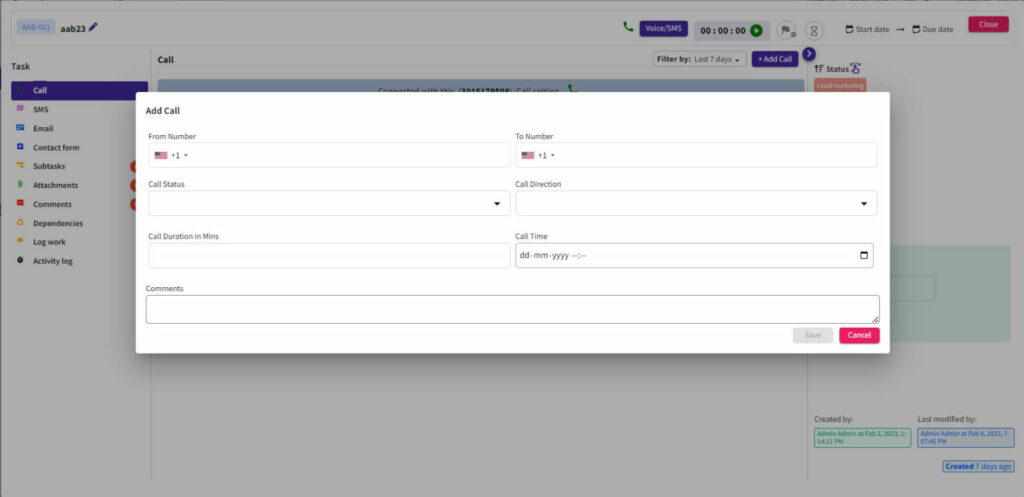
Adding calls to your YoroCRM account is a great way to keep track of all your customer interactions and ensure that you never miss an opportunity to follow up with a lead or customer.
- Once you’re logged in, navigate to the Calls tab in the main menu. This is where you’ll be able to view and manage all your calls in YoroCRM.
- In the Calls tab, click the Add Call button to create a new call record. This will open the Add Call form, where you can enter the details of your call.
- Once you’ve entered all the details for your call, click the Save button to save the call to your YoroCRM account.
SMS
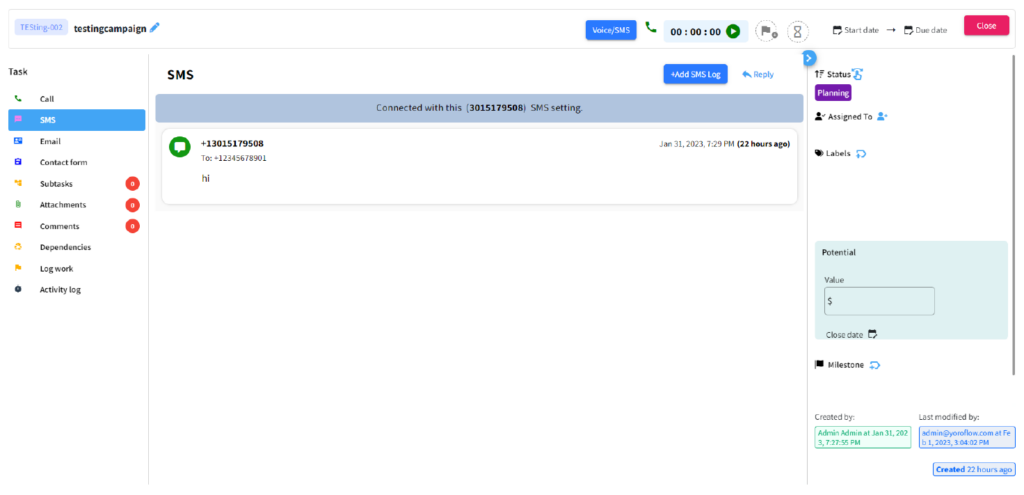
Sending SMS messages is a quick and convenient way to stay in touch with your customers and leads in YoroCRM.
- In the contact record, click the Send SMS button to create a new SMS. This will open the Send SMS form, where you can enter the details of your SMS.
- In the Send SMS form, enter the following details for your SMS:
- To: Enter the recipient’s phone number.
- Message: Enter the text of your SMS.
- Once you’ve entered all the details for your SMS, click the Send button to send the SMS to the recipient.
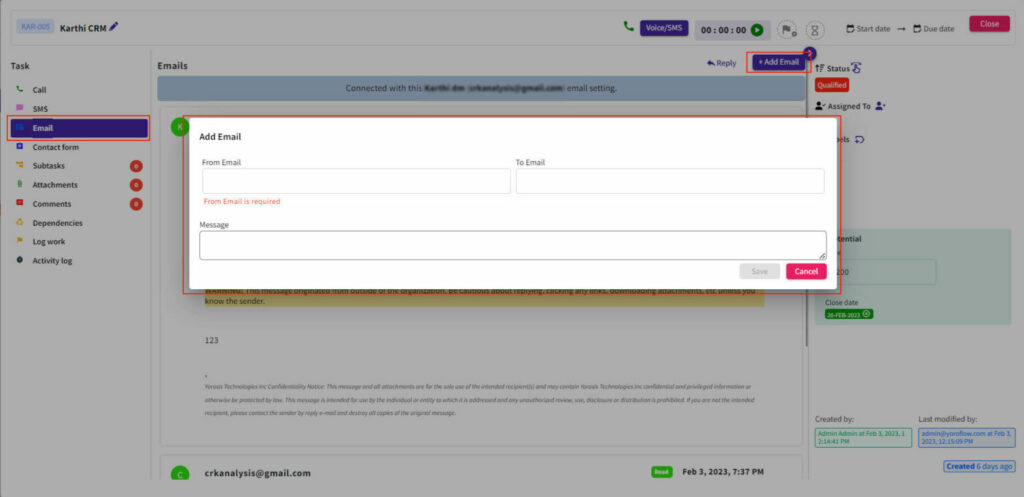
Adding emails in YoroCRM is a great way to keep track of all your communication with your customers and leads.
- In the contact record, click the Add Email button to create a new email. This will open the Add Email form, where you can enter the details of your email.
- In the Add Email form, enter the following details for your email:
- To: Enter the recipient’s email address.
- Message: Enter the text of your email.
- Once you’ve entered all the details for your email, click the Save button to save the email.
How to Add Campaign
YoroCRM allows you to create targeted campaigns to reach out to your customers effectively. Follow these steps to create a campaign in YoroCRM:
- Log in to your YoroCRM account and navigate to the Campaigns module.
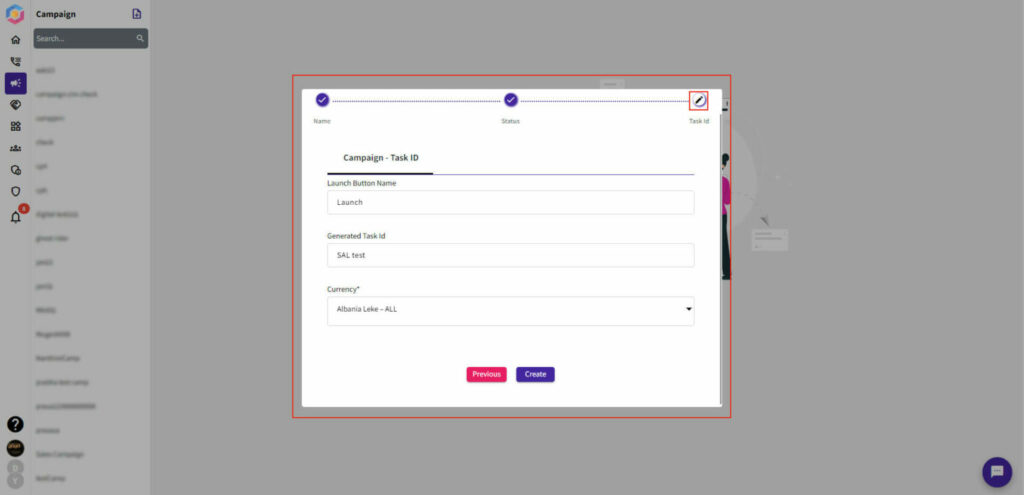
- Click on the “Add Campaign” icon in the top left corner of the screen.
- Enter a name for your campaign in the “Campaign Name” field with key and description as shown below.
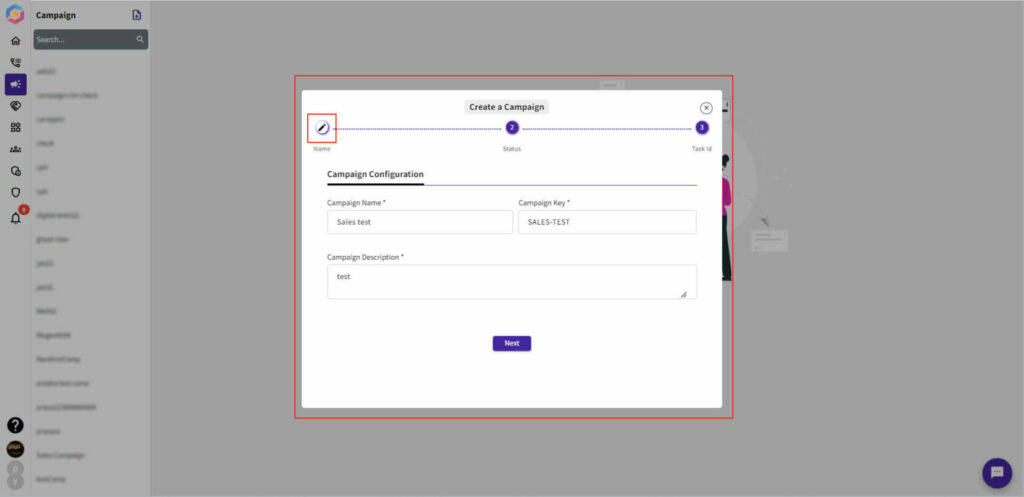
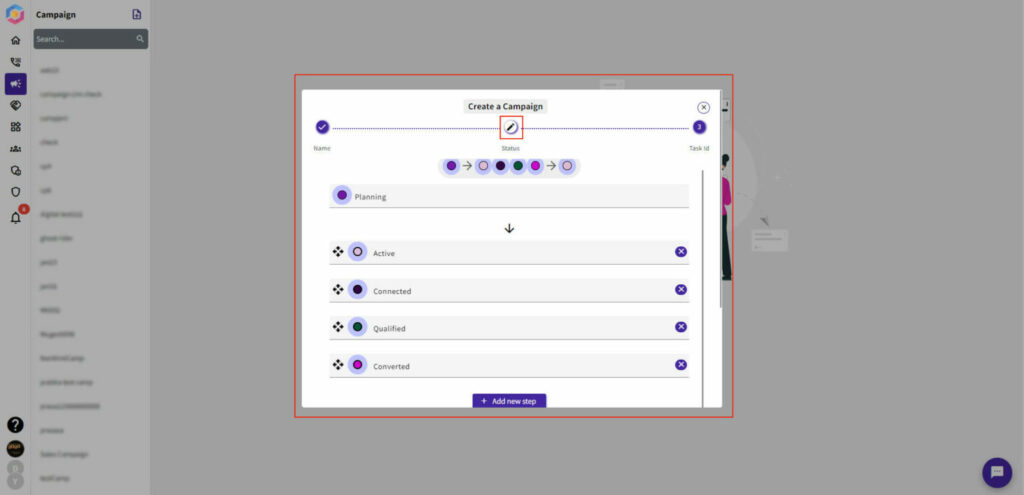
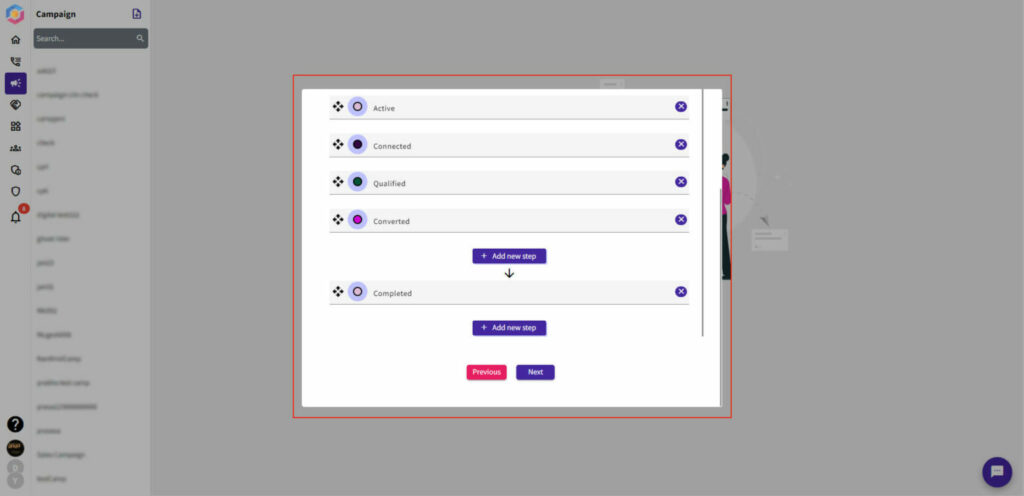
- Choose the appropriate template for your campaign and customize it as needed.
- Create and save your campaign.
Once you have completed these steps, your campaign will be ready to go. You can monitor the progress of your campaign and view the results in the Campaigns module.
How to Add Deal
Creating a deal in YoroCRM is a simple process that can help you keep track of potential sales opportunities and manage your sales pipeline. Follow these steps to create a deal in YoroCRM:
- Navigate to the Deals module.
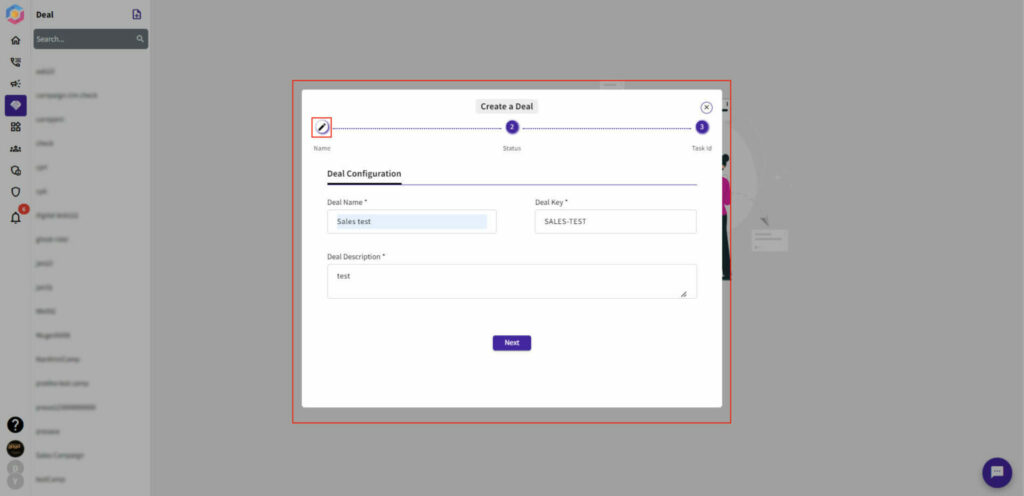
- Click on the “Add Deal” button in the top left corner of the screen.
- Enter the name of the deal in the “Deal Name” field with key and description as shown below.
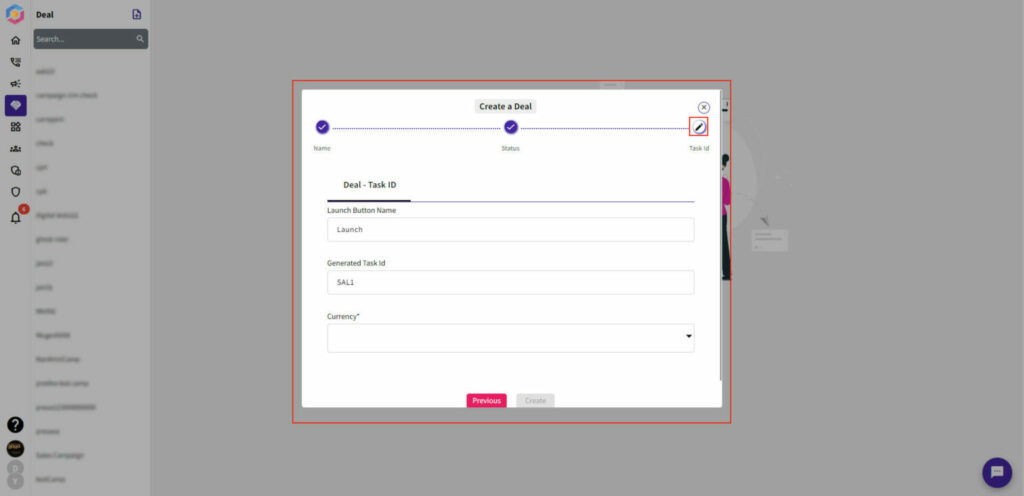
- Add the currency of the deal in the “Value” field.
- Assign the deal to a specific user or team.
- Create and save the deal.


- Once you have completed these steps, the deal will be added to your Deals module and can be tracked and updated as needed. You can also view the status of your deals and analyze your sales pipeline in the Deals module.

My Dashboard
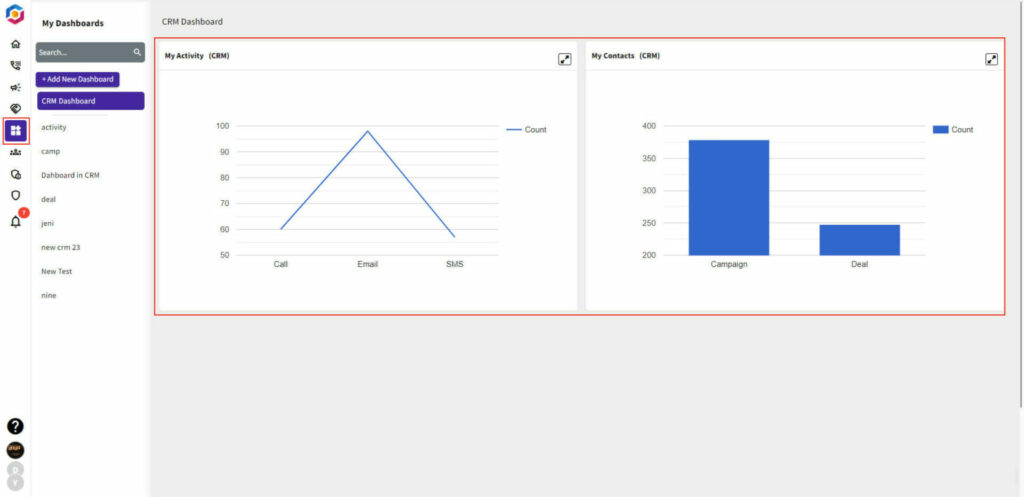
Once you’re logged in, you’ll be taken to the Dashboard automatically. This is where you’ll see a high-level view of your sales, marketing, and customer support activities.
- View the Dashboard components.
- The YoroCRM dashboard is comprised of several components, including:
- My Activities: This section gives you a quick overview of your sales, marketing, and customer support activities, so you can see what’s going on in your business at a glance.
- My Contacts: This section shows you a visual representation of your campaigns and deals, so you can see how many contacts are in each stage and how your sales are progressing.
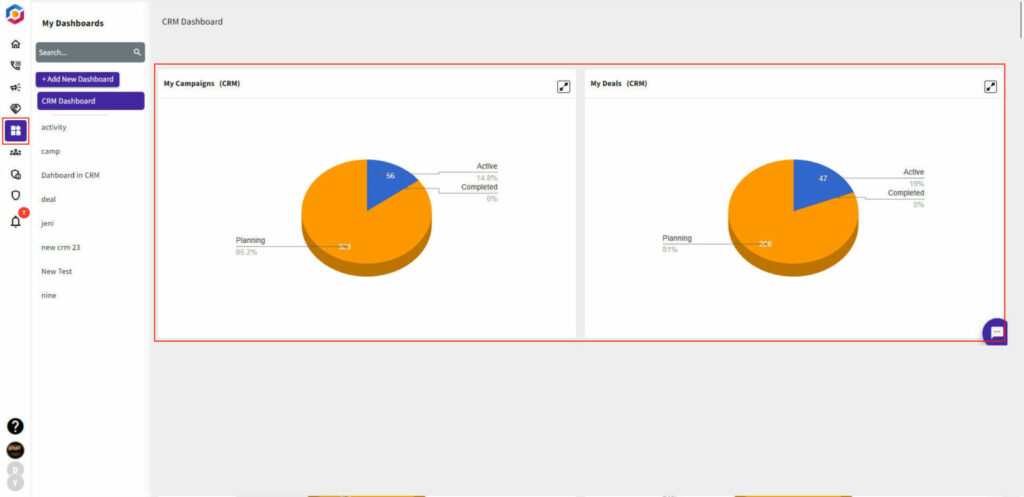
- My Campaigns: This section shows you a pie chart of the status of your campaigns, so you can see which tickets are planning, active, or completed.
- My Deals: This section shows you a pie chart of your marketing performance, so you can see how many deals you’re generating, and how many of those deals are becoming customers.
Integrated Apps
YoroCRM integrates with Twilio, a communication platform, to enhance your customer interactions and provide better customer support.
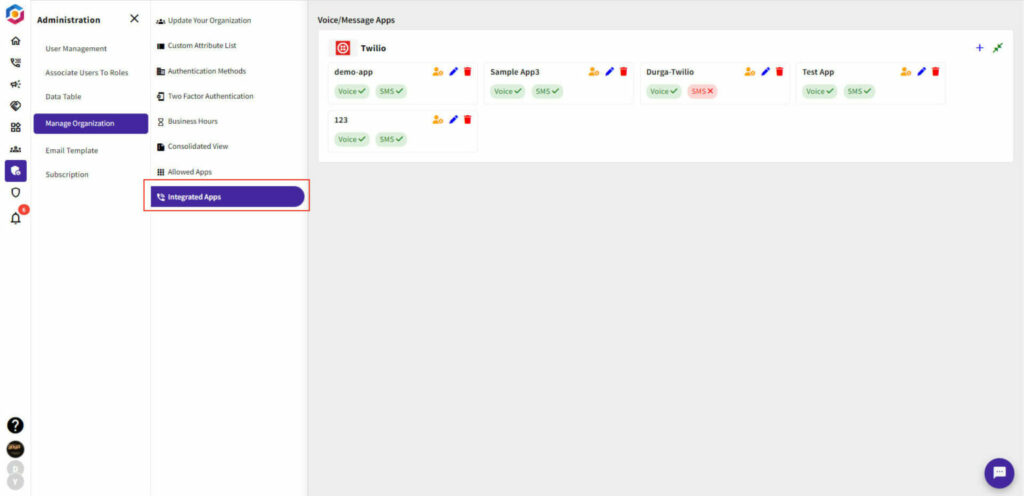
- Log in to your YoroCRM account
- Goto Admin -> Manage Organization -> Integrated Apps
- Select Twilio
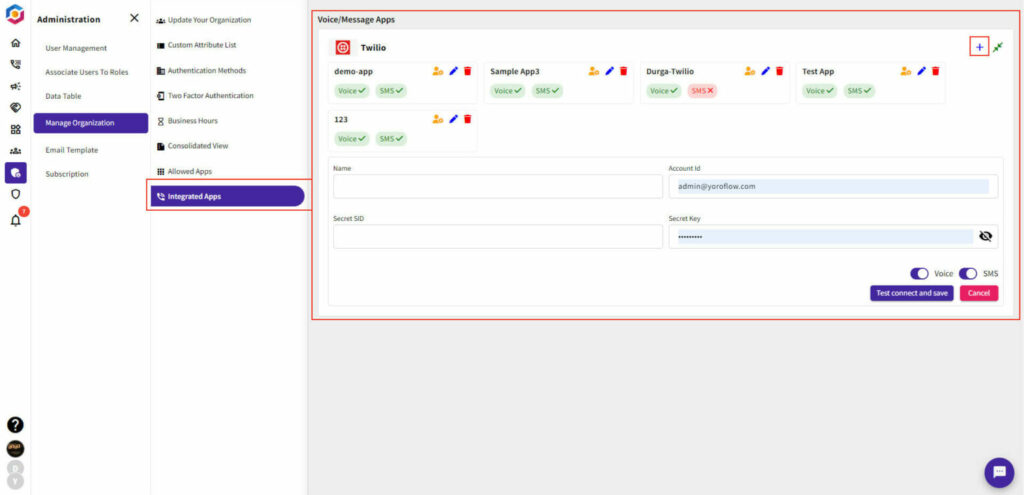
- Provide the Username, Account Name, Secret SID, Secret Key from your twilio account
- Enable Voice & SMS toggle
- Test & Connect Your Twilio Account with YoroCRM
Once you’ve connected your Twilio account, select the number and connect to start making outgoing calls, receive incoming call & Send SMS, recording etc.
In conclusion, the technical features of YoroCRM are what set it apart as a powerful and versatile customer relationship management system. From its advanced sales and marketing automation tools to its intuitive customer service platform, YoroCRM is packed with capabilities that can help businesses of all sizes succeed.
Whether you’re looking to improve your sales processes, streamline your marketing efforts, or provide exceptional customer service, YoroCRM has the tools and features to get the job done.
We hope this blog has given you a better understanding of what YoroCRM has to offer and how it can benefit your business.
If you have any questions or would like to learn more, please don’t hesitate to reach out.


