Table of Contents
Map the Conditions #
- The main purpose of enabling the Decision Table is to map the conditions against actions in a graphical way.
- It shows the fact that some of the actions are to be executed only if some conditions are satisfied.
Start Task #
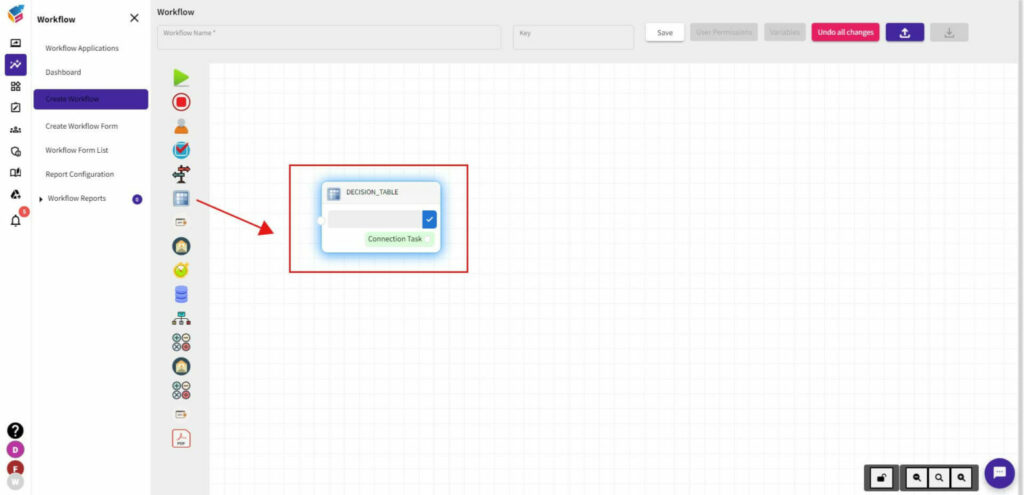
- To start a Decision Table Task, you have to select the Decision Table Task node through the drag and drop feature.

Go To Properties #
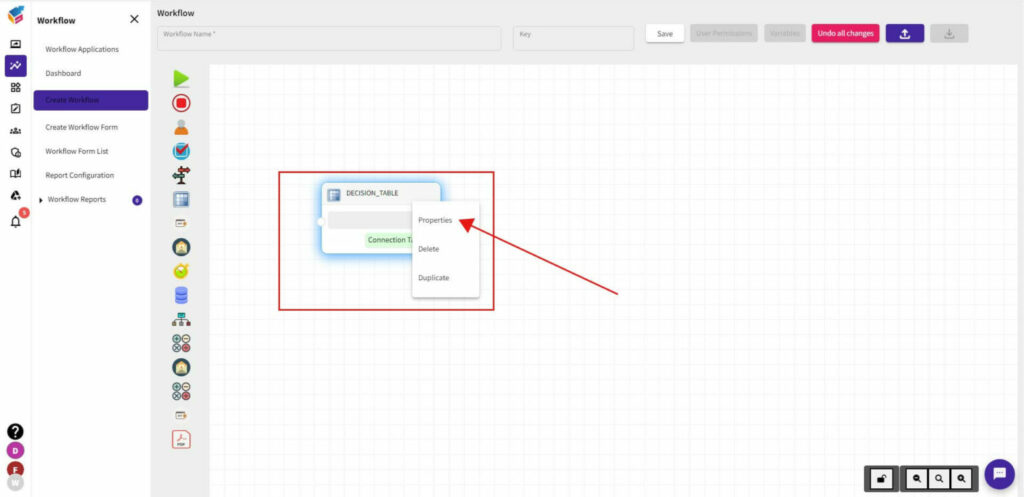
- Right click the Decision Table Task node and you can see three options like Properties, Delete, and Duplicate.

- Select Properties of the Decision Table Task that will show the Decision Table properties like this.
- Specify the Name, and you can either select ‘Run All Conditions’ or ‘Break When Match’ option you need as shown in the screen.

Set New Condition #
- Then, you can also add the New Condition. Once you have done, all the added conditions are saved and you can choose any conditions from that.
Assign Variables #
- Similarly, you can Assign to Variables. Once you have done, all the assigned variables are saved and you can choose variables from that.

- If you do not mention, the page field shows as Empty.
- In the right-side corner, there is an attribute to enable or disable the Restartable option.
Save Task #
- At last, you can either Save, Cancel, or Reset the decision task which you have created.


