


Build Workflow using Yoroflow
Let’s see,
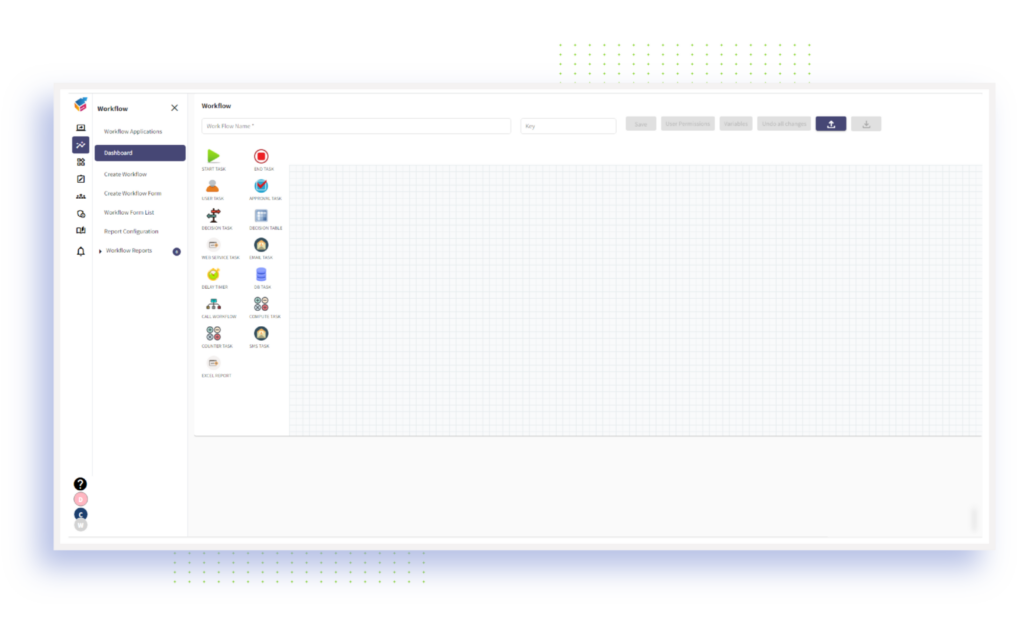
Workflow controls used in Yoroflow’s Workflow automation software
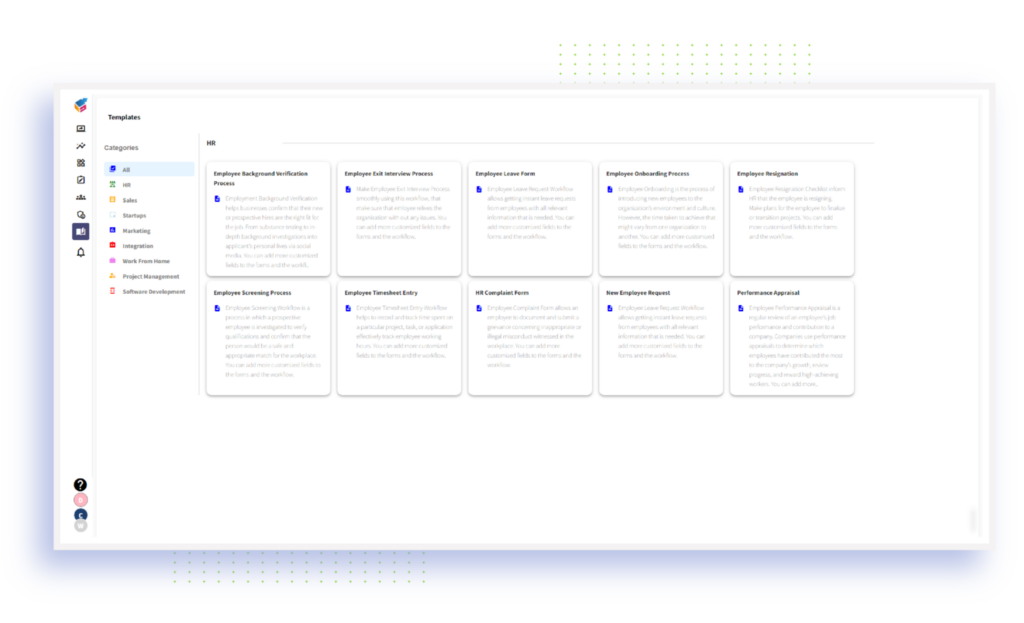
You can create a new workflow from scratch. Also, there are ready-made workflows with its categories such as HR, Sales, Marketing, Start-ups, Integration, Work from Home, Project Management, and Software Development that are shown in the below screen.
Start customizing your workflow based on your needs once you have selected a required template you want.
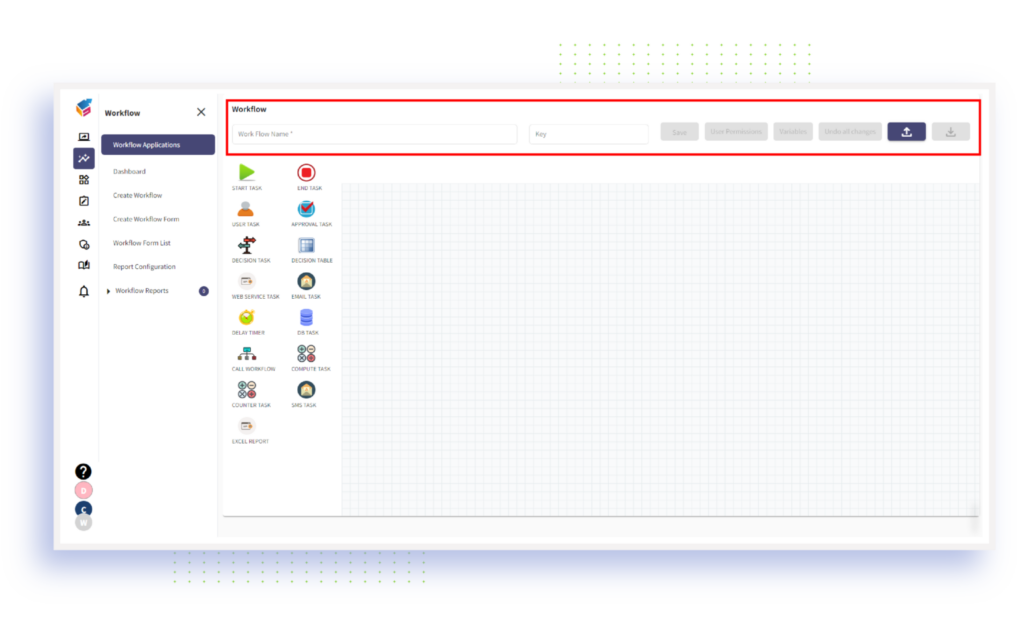
Yoroflow requires a workflow to automate tasks and make life easier for their team. This section will show you how to create a workflow from scratch in Yoroflow using the controls provided.
Steps to create a workflow in Yoroflow
Step 1: Create New Workflow
To get started, navigate to Yoroflow’s “Workflows” section and click on the “Create Workflow” button.
Next, enter a name for your workflow and select the appropriate category (for example, “Sales”).
Next, select the type of workflow you would like to create (for example, “Tasks”).
Then, add workflow name and key and filling out the necessary fields. For example, you can add a user permission, variables, etc.
Finally, add any notes or instructions related to your task and click on the “Save” button.
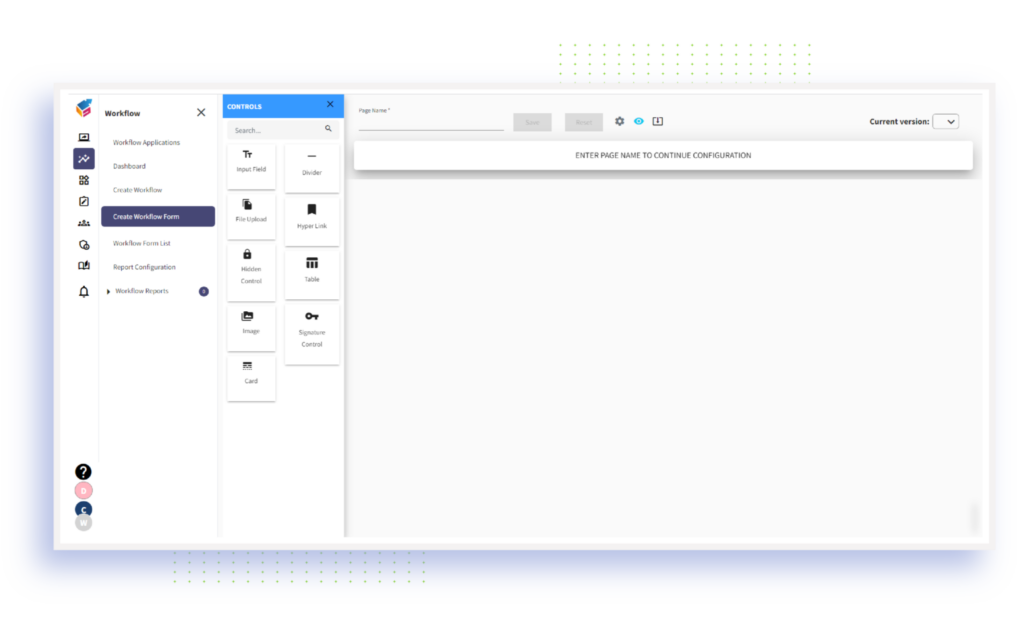
Step 2: Create Workflow Forms
At last, enter the Page Name to save a specific Form.
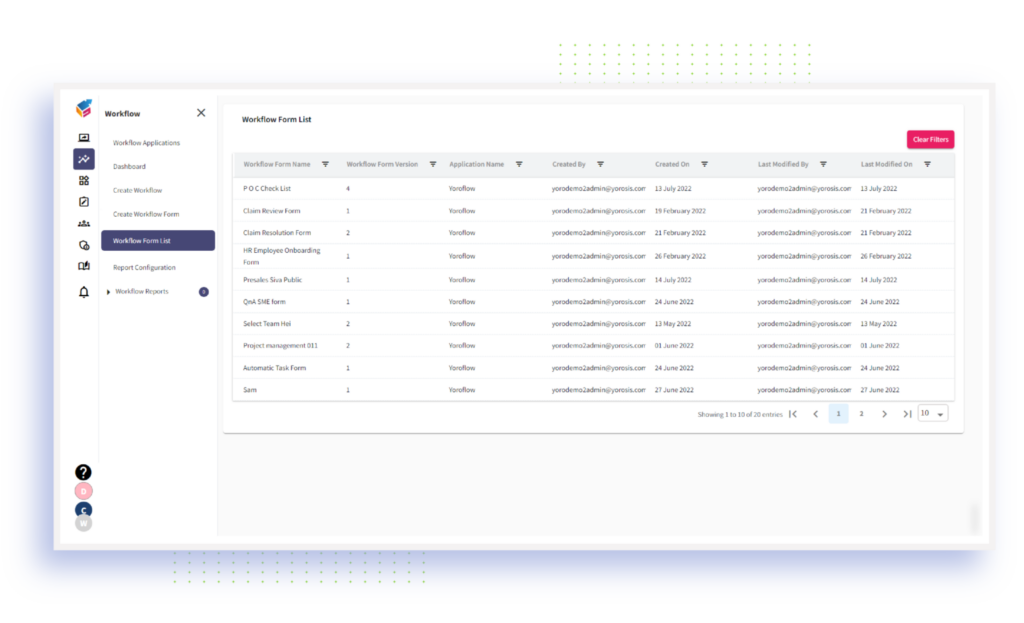
Step 3: Workflow Form List
Using Yoroflow’s workflow form list, you can view all the list of workflow forms along with the Form Name, Form Version, Application Name, etc.,
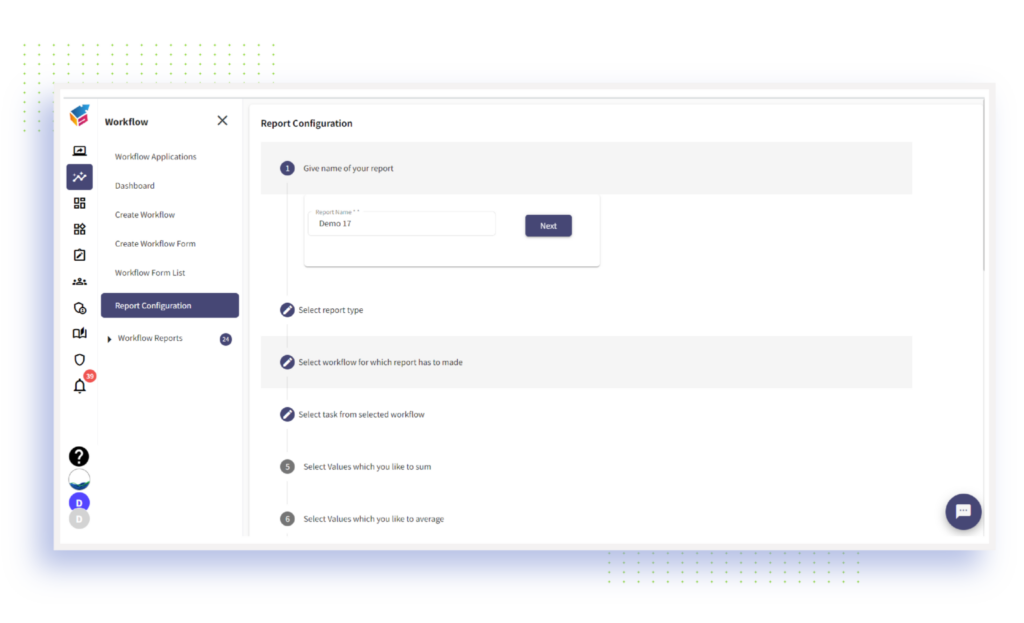
Step 4: Report Configuration
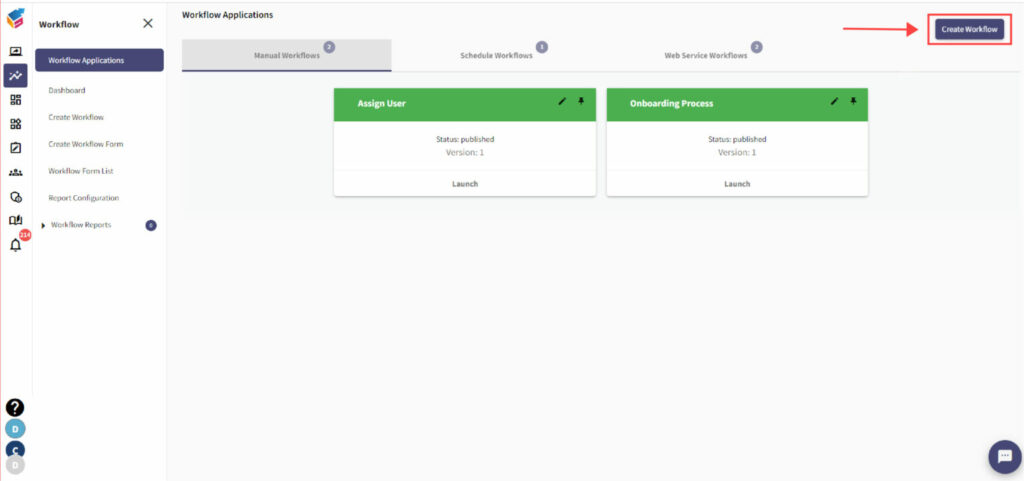
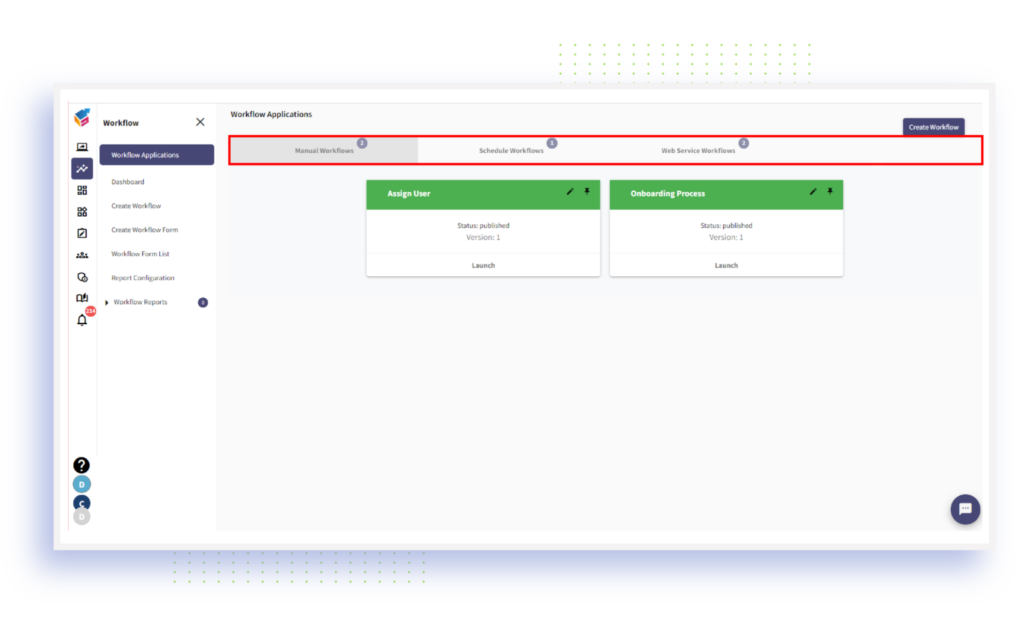
Step 5: Workflow Applications
Yoroflow’s Workflow Applications helps you to view all available workflows assigned to you and publish or launch any application to perform your tasks.
Workflow owner can view the following workflows in detail:
- Manual workflows
- Schedule workflows
- Web Service workflows
Step 6: Workflow Dashboard
There is a Dashboard option available in Workflow tab. In this workflow dashboard, Workflow owner can view the In Process Task, Completed Tasks, and Error Tasks count.
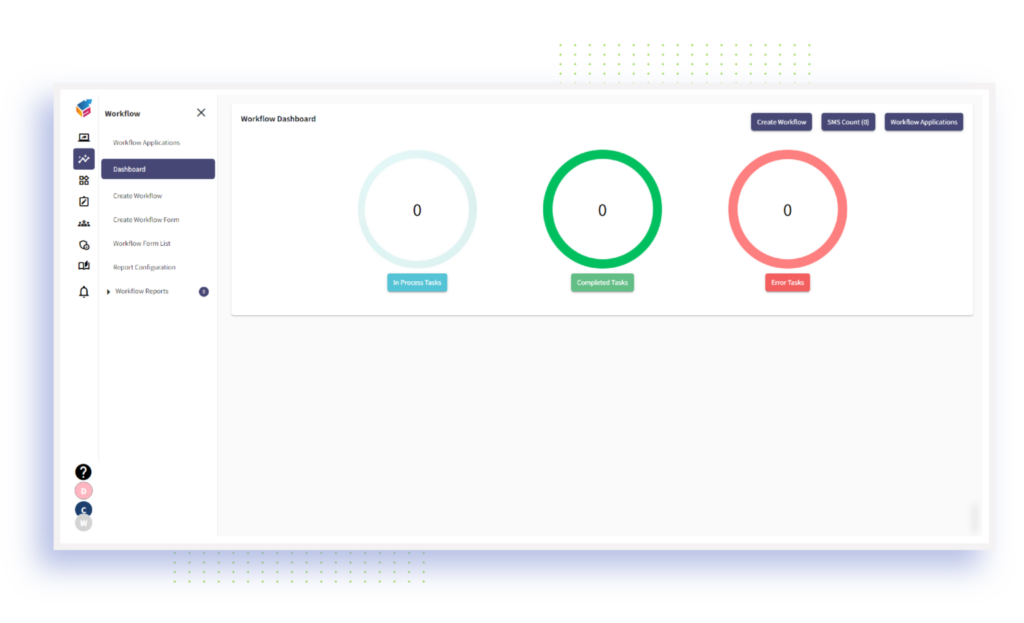
- In process task – ‘In Processes Tasks’ category helps you to view Process Definition Name, Start Date, Last Updated Date, Start By, and Last Updated By details of all your running processes.
- Completed task – ‘Completed Tasks’ category helps you to view Process Definition Name, Start Date, End Date, and Total Time Taken details of all your completed processes.
- Error task – ‘Error Tasks’ category helps you to view Process Definition Name, Task Name, Version, Start Time, Last Updated Time, End Description of all your failed processes.
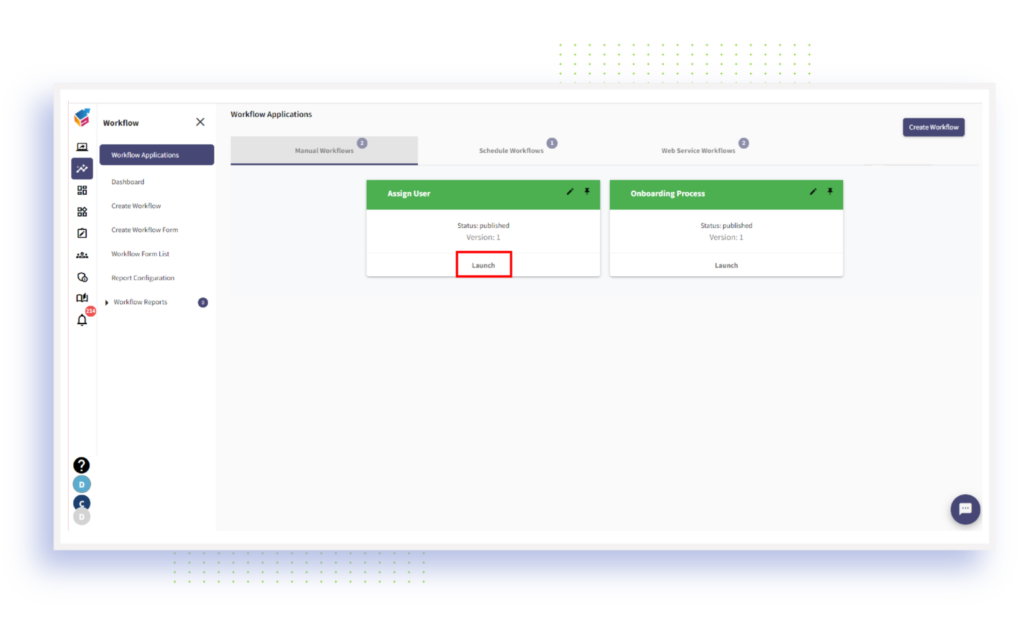
Publish and Launch Workflows
- The completed workflow which comes under Publish category. All the completed workflows that are denoted as blue color code.
- The workflow which is ready to execute is listed under Launch category that is denoted as green color code.
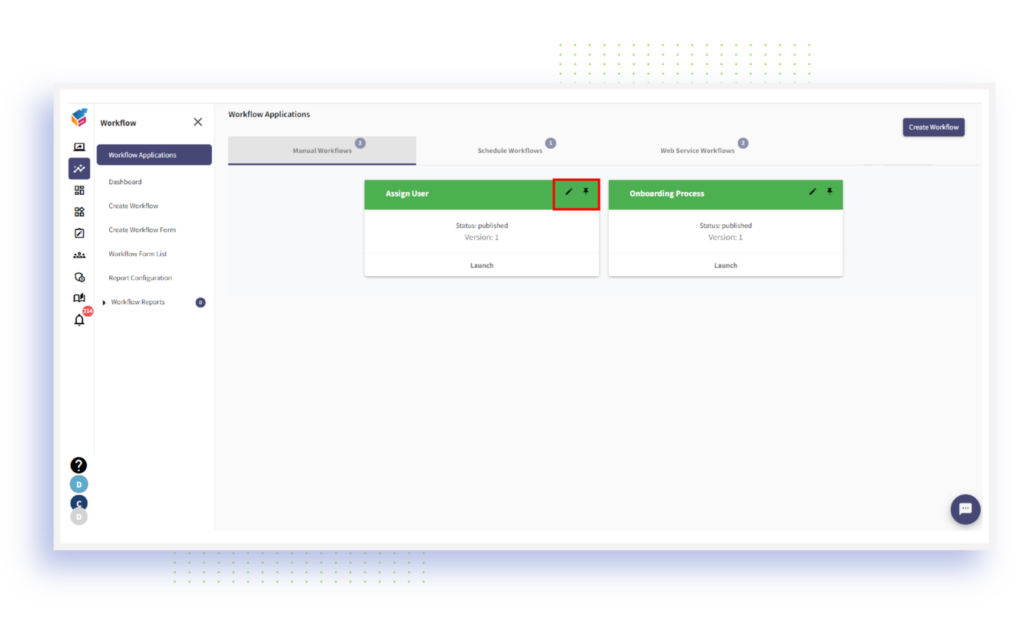
Edit or Pin Workflows
Use “Edit” icon to edit the workflow application or use “Pin” icon to pin or unpin the workflow application. This feature comes in each workflow application separately.
If you have any questions or suggestions about our workflow automation tool, please don’t hesitate to let us know also watch this video tutorial to learn more on workflow creation.
Conclusion
If you’re interested in creating a workflow from scratch in Yoroflow, this guide will walk you through the basics. By following these steps, your workflow creation will be better organized and easier to manage. Whether you’re just starting out or looking to make some changes to your existing approach, this guide is for you. Thanks for reading!


